The new version of Capture One 20.1 was released today, approximately six months after the release of Capture One 20. I am happy that this version brings some great and useful improvements – brand-new retouch tools and before/after view. An affordable version targeted on Nikon cameras shooters is available too.
First of all, I have to say that users were asking both main new features for a while and adding them is a step to catch up with the competition, but it doesn’t matter – they are very useful and make editing easier for current users and may be important for other users considering switching to Capture One.
Brand new retouch tools
Healing brush and clone stamp tools are closely bonded to the concept of layers in Capture One. This brings certain advantages like the possibility to switch on and off the edits temporarily, naming them or copying them selectively between photos. On the other hands, this concept had limitations too: every layer had a single source for retouching relative to every brushstroke, how it is shown on the following image:
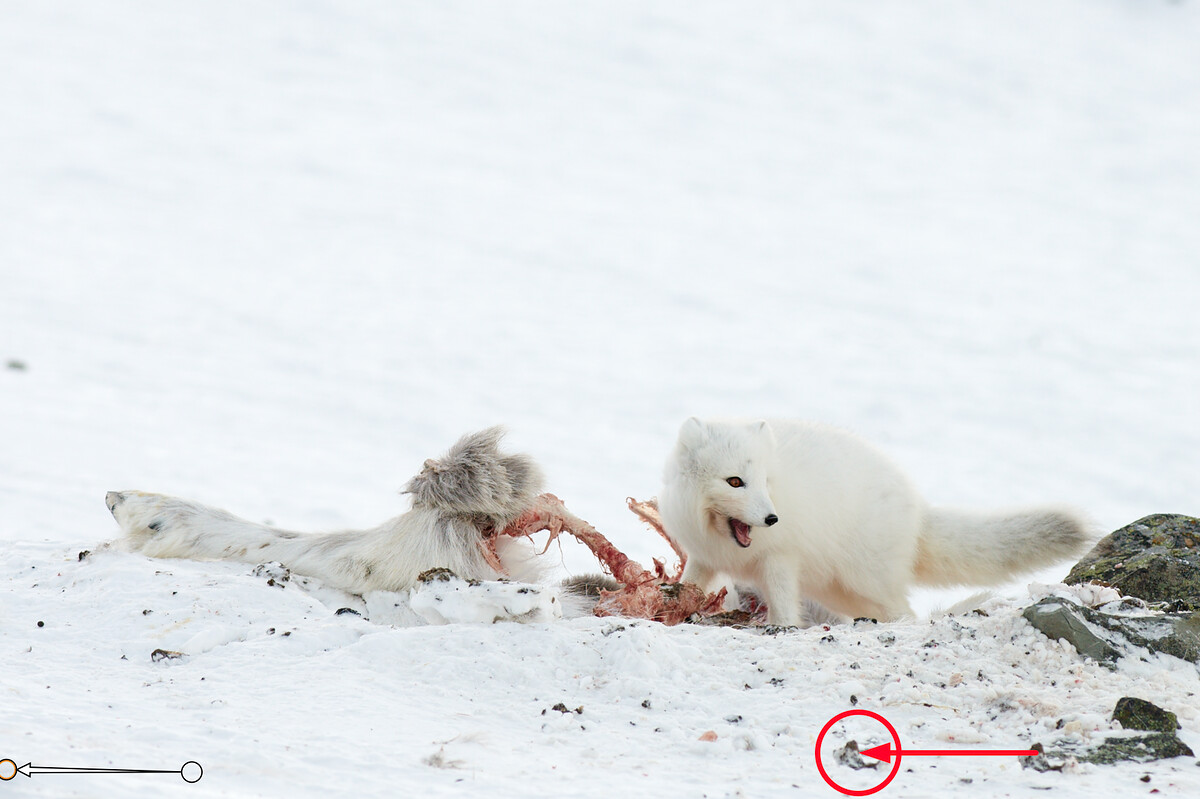
As you can see, more retouching layers were needed for complex retouches. And the total number of layers is limited in Capture One. This problem is a thing of the past starting from version 20.1. Now you can easily use as many sources for retouching in a single layer as you need:
Even though the basic usage of the tools is similar to previous versions, there are some differences. The main one is that original single brush for all was split into three separate tools which create corresponding layers automatically when you start to paint over the Background layer:
- Draw mask (keyboard shortcut
Bas a Brush) is a brush for adjustments layers - Draw Healing Mask draws masks for healing layers. Its keyboard shortcut is
Q(you may easily remember it as the Q letter resembles the circle with the arrow which represents the retouch in the photo) - Draw Cloning Mask draws masks for cloning layers. Its keyboard shortcut
S(like (clone) Stamp) is the same as in Photoshop or Affinity Photo
New tools required some changes in the main toolbar:

The Layers tool changed similarly:
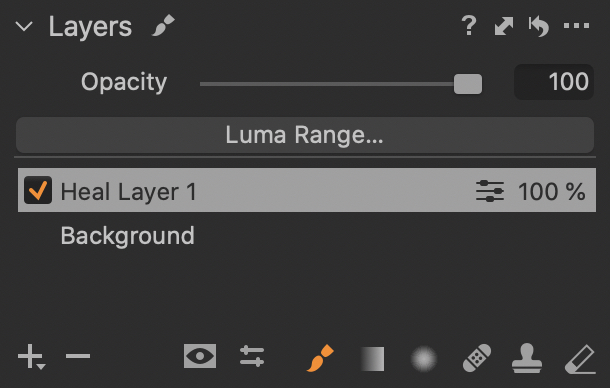
This new approach may divide users – some would like to stay with a single brush with different behavior driven by layer type, and some will appreciate the behavior similar to other editors like Photoshop. You will probably need some time to adapt because drawing with the standard brush like before into the repair layer will automatically create a new adjustments layer or will paint into the topmost existing adjustments layer. The Eraser tool (keyboard shortcut E) erases masks for each type of layer.
All tools now have new mouse cursors so it is evident, which tool is active:

The great thing is, that each stroke can be easily modified later by brush or eraser. You just need to select a circle representing single retouch by clicking it, it’s color will change to orange and then drawing and erasing will modify its mask:
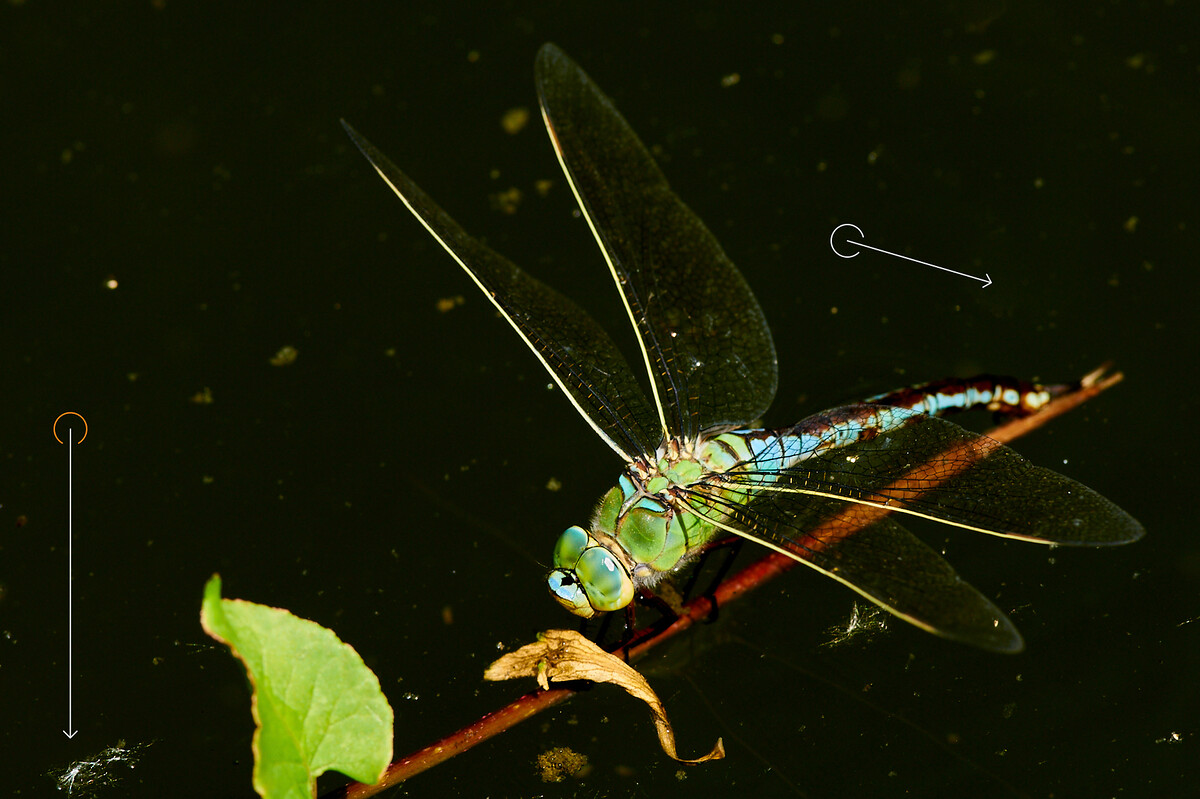
You can create a series of retouches of different parts of the image this way, if the same relative source will work:
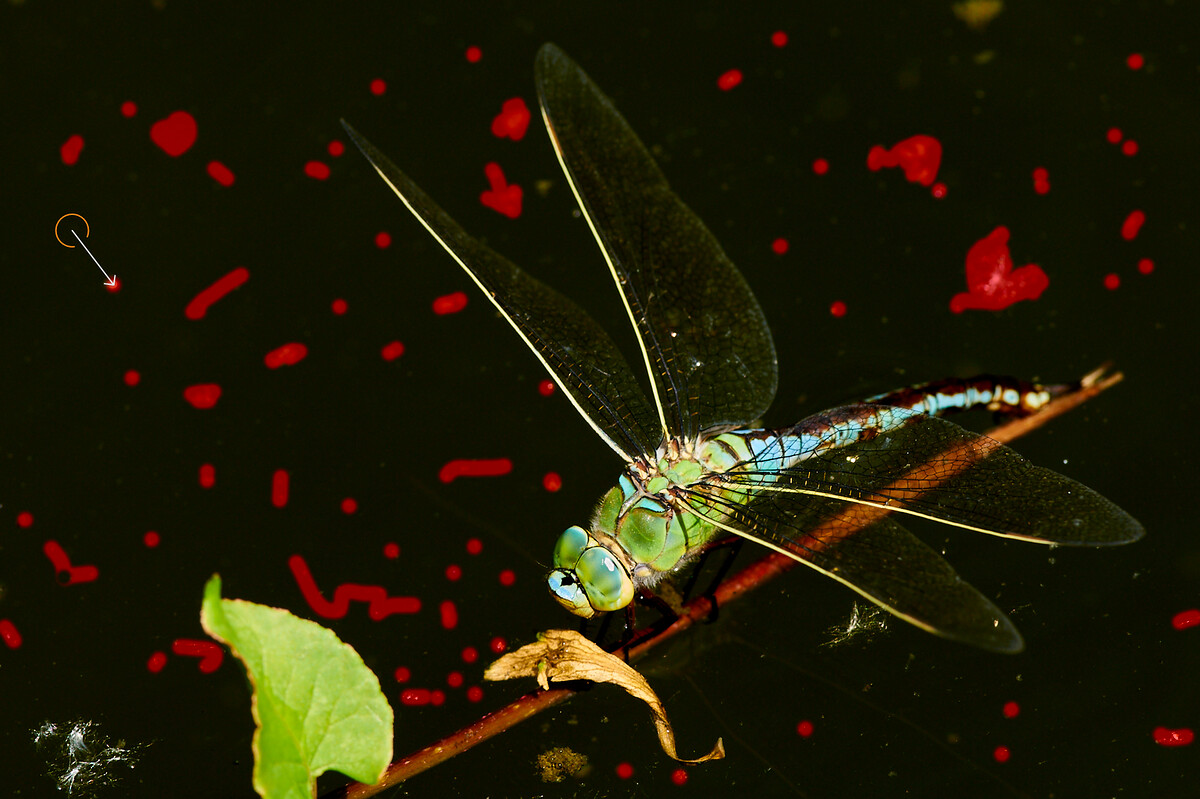
Anyway, this concept similar to the way how retouches worked in older Capture One versions probably has no other advantage than less of the visual clutter in the photo with a smaller number of arrows representing individual retouches.
The second click on the circle deselects the retouch, and a new brush stroke will create a new retouch with an automatically selected source. If you prefer to use a different source for your retouch, you can easily drag the circle with the mouse. Alternatively, you can choose the source manually before you start to draw a mask by clicking the appropriate area with holding the Alt key. If you decide to remove a single retouch, just select it by clicking on the circle and then press Backspace (on Mac) or Delete (on Windows).
It is still true that individual retouches do not “see” each other. If you select the retouched area as a source, the new retouch will use the original unretouched image. This is probably for performance reasons because you can edit all existing retouches and this way Capture One has not to recalculate the result of each retouch after changing the other one. It is still a bit limiting but with the ability to choose multiple retouch sources in a single layer, it matters less.
It is a bit disappointing, that you can reposition the retouch source, but not its target. I used it a few times in case of a series of very similar, but not exactly the same images. Anyway, I am personally very satisfied with retouching tools now. Probably the last thing I miss is the ability to put multiple radial gradients into a single layer. Hopefully Phase One will bring this feature into future versions.
Unexpected regression is, that you cannot use retouches when editing offline files in version 20.1. It is true, that preview, which you edit in such a case, differs from the original as it is smaller and compressed, so the result of such a retouch may be inaccurate, but it is still pity, that we lost this ability.
Before/After view of the edited photo
Until this version, the Capture One used a temporary reset of settings to display images before edits. Actually, I liked the idea and didn’t miss a different approach (especially because with Capture One I started to use before/after view for individual tools more often than globally), but I know, that many people were asking for a solution that better fits their needs. And Phase One was finally listing to them and created new Before/After tool available from the main menu View → Before/After, with keyboard shortcut Y or from the main toolbar:

There are two modes of displaying the before and after image: the first one is called Full View and switches between both states of the image, the second one called Split View Slider splits the image into two halves – left one displays the unedited image and right one edited version. In this view, you can drag the boundary between both views by mouse.
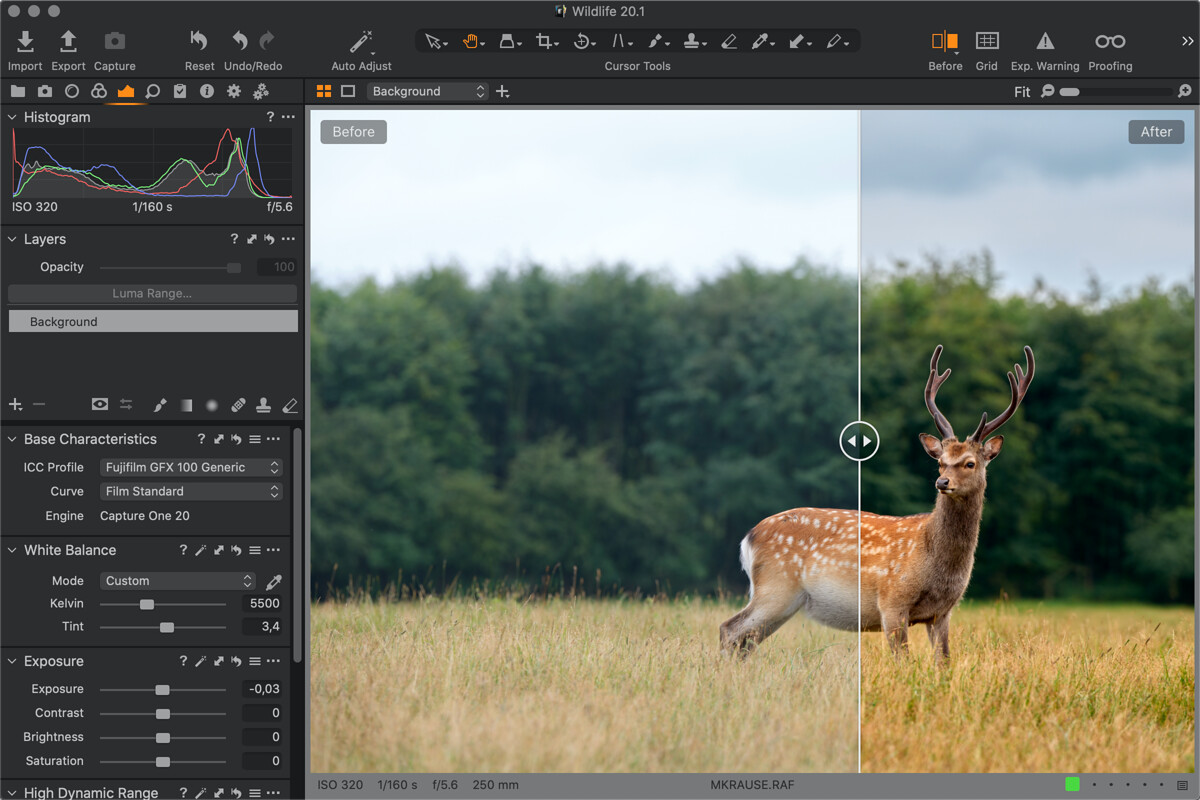
You can switch between these two modes from the main menu View → Before/After Mode, from the context menu which appears when you click and hold the Before/After button in the toolbar and with keyboard shortcut Shift+Y. Like always, you can change keyboard shortcuts to find your needs, if you want.
Funkce Before/After in its current state will probably work for most users. Ony missing mode known from other applications is side by side view of edited and unedited photos. Because Capture One doesn’t offer an editing history, you cannot choose the state of the “before“ image – it is always original unedited RAW. It is still true that Capture One doesn’t disable geometric adjustments (crop, rotation, keystone, and geometric distortion fixes made by lens profile) for the unedited image. It makes a good sense and other photo applications behave mostly the same.
Editing in before/after view behaves differently in each mode. When you use Full View mode, any adjustments made will automatically switch you back to the edited image. If you are in Split View Slider, you can continue with editing the photo and changes display in After area of the image (with exception of geometric adjustments which are disabled in this mode).
With the new Before/After function the temporary reset of edits by clicking on reset and holding the Alt key is gone, which I think is a shame. Of course, you can still use this feature to temporarily reset individual tools.
Other news
There are a bunch of smaller features for new users of the Capture One. Maybe most important is improved import of Lightroom catalog, which can now handle offline images too and reports failed imports (i.e. for unsupported file formats) better than before.
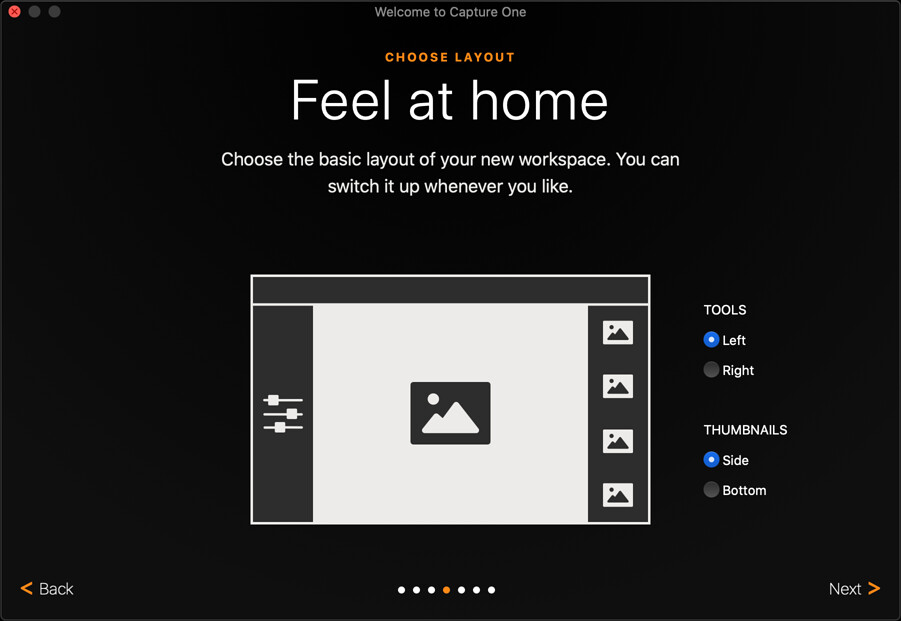
Onboarding for new users has improved a lot. The process of logging to users’ account and license activation is more convenient and understandable. The simple wizard offers an option to adapt the user interface a bit (for example to move tools to the left side).
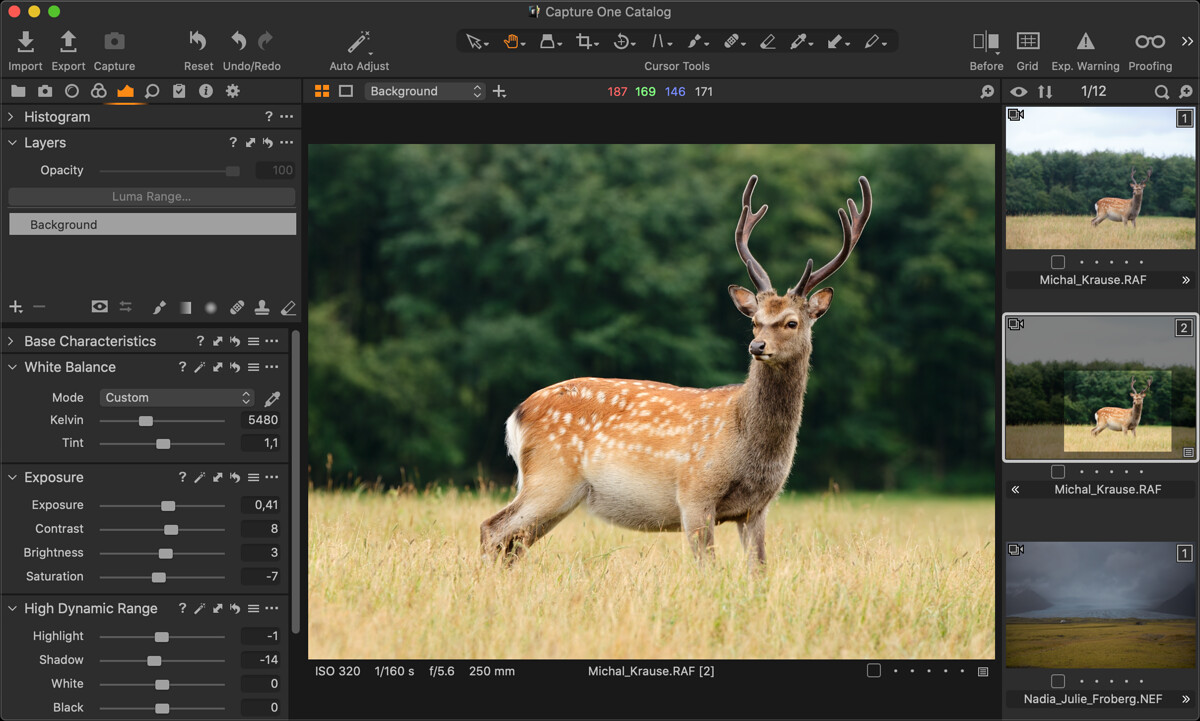
If you want to just test Capture One, you can start with the bundled catalog with sample images. I am honored, that you will find one of my photos in this sample catalog, so you start to play with it or just look at the details that the medium format Fujifilm GFX100 can capture.
Version 20.1 changed preload workspaces – some similar ones were merged into one and the special black and white editing workspace is gone. You can easily create your own if you like it.
Big news for Nikon shooters is a special Nikon edition. Similarly to existing Fujifilm and Sony versions, the Capture One for Nikon offers all features of the Pro version limited to RAW files from Nikon cameras only for a lower price. You can choose a perpetual license or subscription and a more limited free Express version is available too. With a new version, Nikon shooters get the simulation of Picture Control profiles too – it is supported for these cameras: D6, D5, D850, D810/D810A, D800, D780, D750, D610, D500, D7500, D5600, D5500, D3500, D3400, D3300, Z7, Z6 a Z50.
As usual, the new version adds support for few more cameras:
- Canon 250D
- Canon PowerShot G5 X Mark II
- Canon PowerShot G7 X Mark III
- Nikon P950
- Leica M10 Monochrom
- Olympus E-M1 Mark III
- Phase One iXH-150
- Zeiss ZX
and lenses:
- Sony FE 20mm F1.8 G (SEL20F18G)
- Tamron 28-75mm F2.8 Di III RXD (Sony FE)
- Fujifilm FUJINON XF16-55mm F2.8 R LM WR
- Phase One XT – Rodenstock HR Digaron-W 50mm f/4
- Ricoh GR III fixed lens
- Canon PowerShot G5 X Mark II fixed lens
The last news is a new logo. OK, I will get used to it, although I preferred the previous logo. The change is related to the fact that individual editions now have a different branding using the corporate colors of cooperating camera manufacturers.

Capture One 20.1 is a free update for users of version 20. You can upgrade to it from versions 11 and 12. The prices of new licenses are as follows:
- version Pro: perpetual license starts from 349 euro, subscriptions starts from 220 euro/year
- Fujifilm/Nikon/Sony editions: perpetual license starts from 149 euro, subscriptions starts from 109 euro/year
- Fujifilm/Nikon/Sony Express versions: free
(European prices with VAT)
Do you want to master Capture One?
You can buy my e-book Capture One Effectively which is a complete guide to this professional photo management and editing application. The well-organized content helps you master the entire process, from importing photos to editing, organizing, and managing metadata, and finally printing or exporting. There are also tips for those switching from other tools like Adobe Lightroom, or a description of my workflows that I’ve honed over years of actually using Capture One to process my own photos. It is available in formats suitable for e-book readers as well as in a more than 400-page-long PDF!
Get Capture One with a 20% discount
The fastest of you will get a 20% discount if you purchase using the button below! The discount applies to the first payment of a license or annual subscription and is for new customers only. I will get the same discount on my next payment.
Get Capture One at 20% off