Capture One Pro once was just a tool for developing RAWs and didn’t include photo management tools, and I know from my workshops that some users lack the straightforward ability to edit photos without catalogs, imports, and organizational features. Fortunately for them, this function has not quite disappeared, you just need to know this simple trick.
This tip depends on sessions, which are available only in Capture One Pro, so it won’t work for users of free Capture One Express.
As you may know, Capture One Pro offers two basic options for managing photos: catalogs and sessions. In short, the catalog is a large database for managing many (or even all) your photos, allowing fast and advanced search and sophisticated organization, while sessions can be considered certain micro-catalogs and are usually used to process single job, therefore they are faster and easy to move — for example from a computer hard drive to an external disk or network storage. And one of the sessions features can be used to directly edit photos located anywhere on the disk. The procedure is simple.
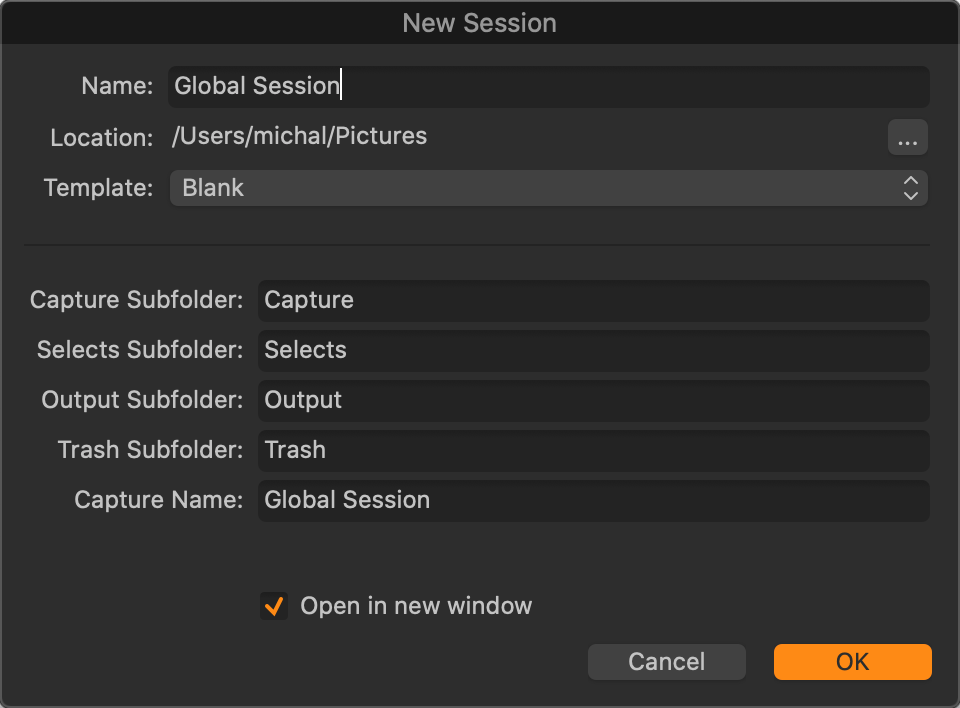
The first step is to create a new session using the File → New Session menu. Name it as you like (field Name) and place it in the desired folder (field Location) — the location does not matter much, the session will not even require too much disk space. A new session will open automatically after you create it.
The session always contains few subfolders where photos are typically stored (Capture, Selects, Output, and Trash), but moreover you can browse any folders on any drive in the System Folders section of the palette Library:
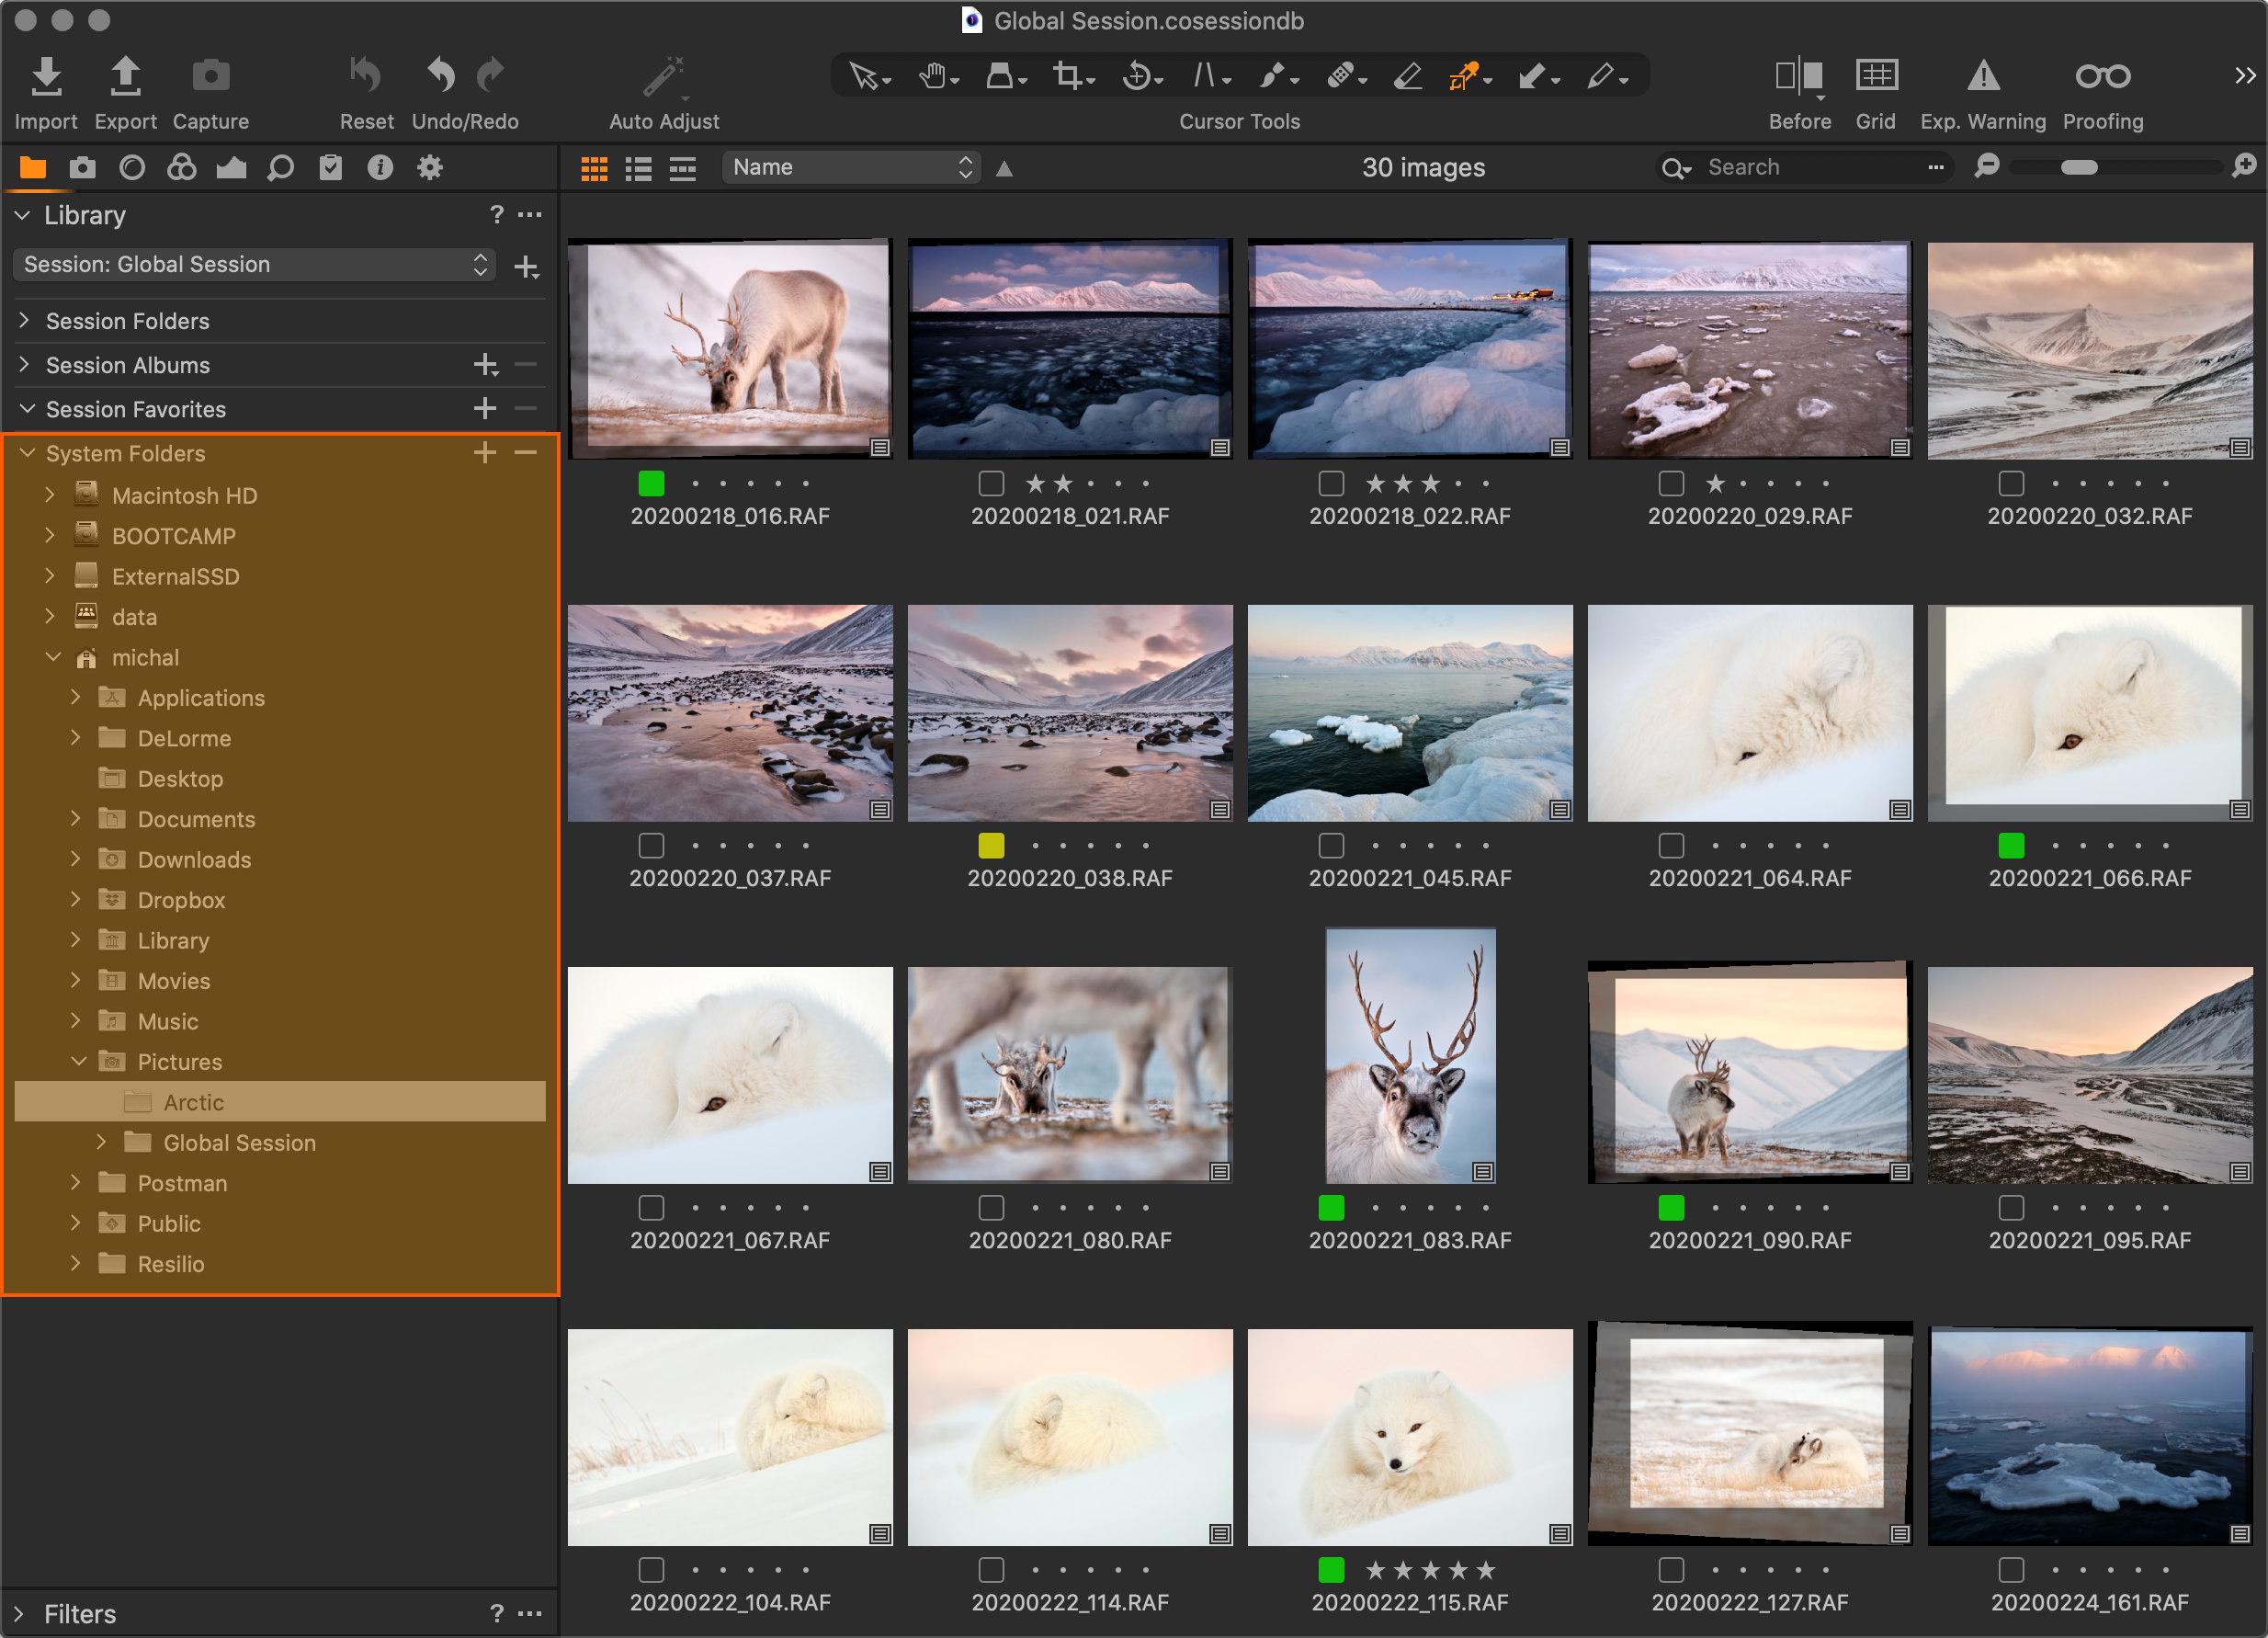
Here you can open any photo and start editing the same way you know from using a catalog or sessions. You can also change metadata and use color labels or star ratings, as you can see on the screenshot above.
Specifics and Limitations
This approach has some specifics and limitations that should probably not bother those interested in such a way of working, but it is still good to know about them.
Metadata, such as photo ratings, can be used to search and filter photos exclusively within a single folder. You cannot perform a global search and these photos are not searched by smart albums created within the session (section Session Albums in the palette Library) — for example, a default smart album Five Stars collecting photos with a five-star rating will only find images located in the main session folders (e.g. Capture) and not anywhere else on the disk.
You can partly get around this limitation by adding some folders to the Session Favorites section of the Library palette — you can drag them here by mouse, or you can right-click the folder and select Add To Favorites from the context menu. Of course, it is not very convenient to add all your folders to Session Favorites, so this method has its limits. More often, Session Favorites will probably serve as bookmarks for quickly finding the folder you need to work with.
You can add the selected photos to the standard album created in the session by dragging and dropping them into it, and then you can search photos in these albums in the usual way, however, they still won’t appear in smart albums. This way, you can group related photos from different folders.
Photos you delete are moved to the Trash folder within the session. This should be the only reason why a session could take up unnecessarily much disk space. It is, therefore, necessary to empty the trash from time to time or use the Image → Delete form Disk… function (Cmd+Ctrl+Backspace on Mac,Ctrl+Delete on Windows) for immediate deleting, but be careful — you cannot undo this operation.
And perhaps the most important thing in the end: in each folder in which you will edit photos in this way, Capture One will create a subfolder called CaptureOne with previews and adjustments. Therefore, you must never delete this folder, otherwise, you may lose the edits — in the current version, you will definitely lose all masks of local adjustments and retouching layers.
So, do I really need a session at all? What happens if I delete it? Can I move files around the disk?
You can’t do without a session because Capture One simply needs you to open a catalog or session before you start to work. But if you lose it for some reason, nothing terrible will happen — the adjustments will be preserved, you will lose the albums. The procedure for solving this situation is easy, you just create a new session, simply browse the folder with your photos again, and the previously made edits and metadata will be loaded from the above-mentioned CaptureOne subfolder.
Also, moving the entire folder with images is not a problem — again, just browse it in a new location, and Capture One will use the edits from the CaptureOne subfolder.
If you need to move only a few photos, the easiest and most secure way is to do it in Capture One — simply drag the selected photos to another folder and the application will make sure that the edits are moved correctly with them. You can also move entire folders in Capture One, and I recommend doing it this way when you are using albums — otherwise, moving folders outside of Capture One will break the binding of photos to albums, and it cannot be fixed later.
Conclusion
If you appreciate the quality of output and Capture One, but don’t want to use photo management tools, this method is a rather convenient alternative. Following simple procedures and rules mentioned in this article, everything should work smoothly and to your satisfaction.
Do you want to master Capture One?
You can buy my e-book Capture One: Work Effectively — a complete guide to this professional photo management and editing application. The well-organized content helps you master the entire process, from importing and organizing photos to editing, managing metadata, and finally printing or exporting.
It also includes tips for those switching from other tools like Adobe Lightroom, as well as a detailed description of my own workflows that I’ve refined over years of using Capture One to process my photos.
The e-book is available in formats suitable for e-book readers and as a more than 400-page PDF.