After some less exciting recent updates, the fall version of Capture One comes with a great implementation of automatic mask creation using AI algorithms, the ReTether feature that saves you when the camera is disconnected from the computer during tethered shooting, and a number of other small features that will please photographers and make their lives easier.
If you have a subscription, you can upgrade to the latest version immediately; if you have a perpetual license and find the new features useful, go to your profile on the Capture One website where you should find information about the price at which you can upgrade your existing license – it is based on the Loyalty Program. If you purchased your version 23 license last October, you may have missed the 12-month window for the 40% discount, which is definitely not your fault. Try to contact support, they may be able to give you a coupon for the 40% discount.
AI masks
The AI masks, undoubtedly the highlight of the new version, were already established by competitors some time ago, and Capture One is catching up a bit in this respect. However, after a few weeks of beta testing, I can say that they have really done a great job.
One of the issues that developers of similar AI-based systems have to deal with is the concept of the user interface. The simplest way is to add buttons that select a specific area in the photo – a face, an animal, the sky, and so on. The problem is that there are almost unlimited possibilities, so it is simply not possible to cover them all. The creators of Capture One decided to split AI masking into two tools.
Automatic selections
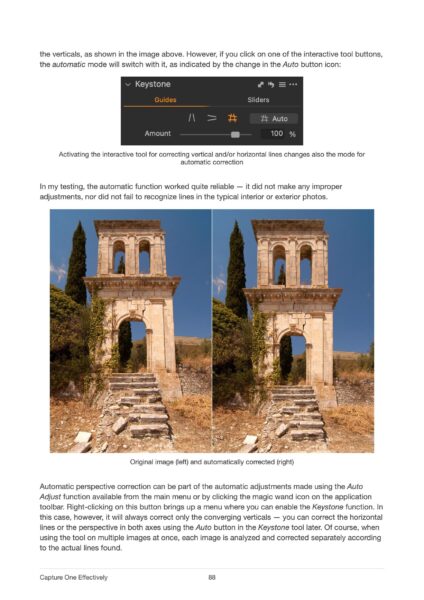
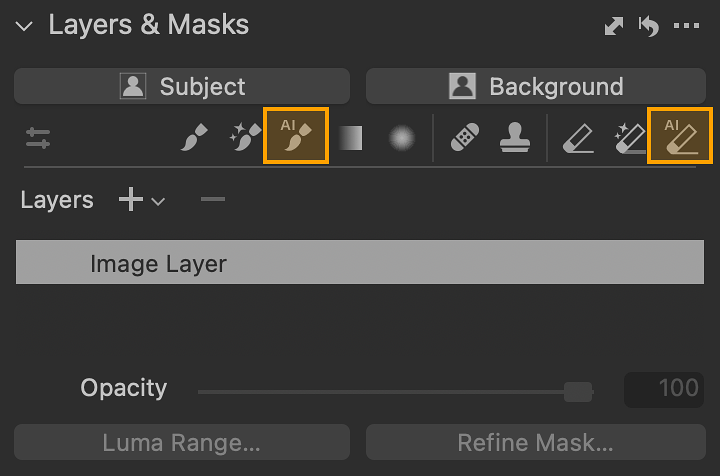
Two buttons in the Layers & Masks tool called Subject and Background work completely automatically. As their names suggest, the former selects the main subject of the photo and the latter selects the background. Just press one of them and Capture One will create a new mask with the appropriate selection. a special behavior of these buttons is that they always create a new layer and never change the mask of an active layer.

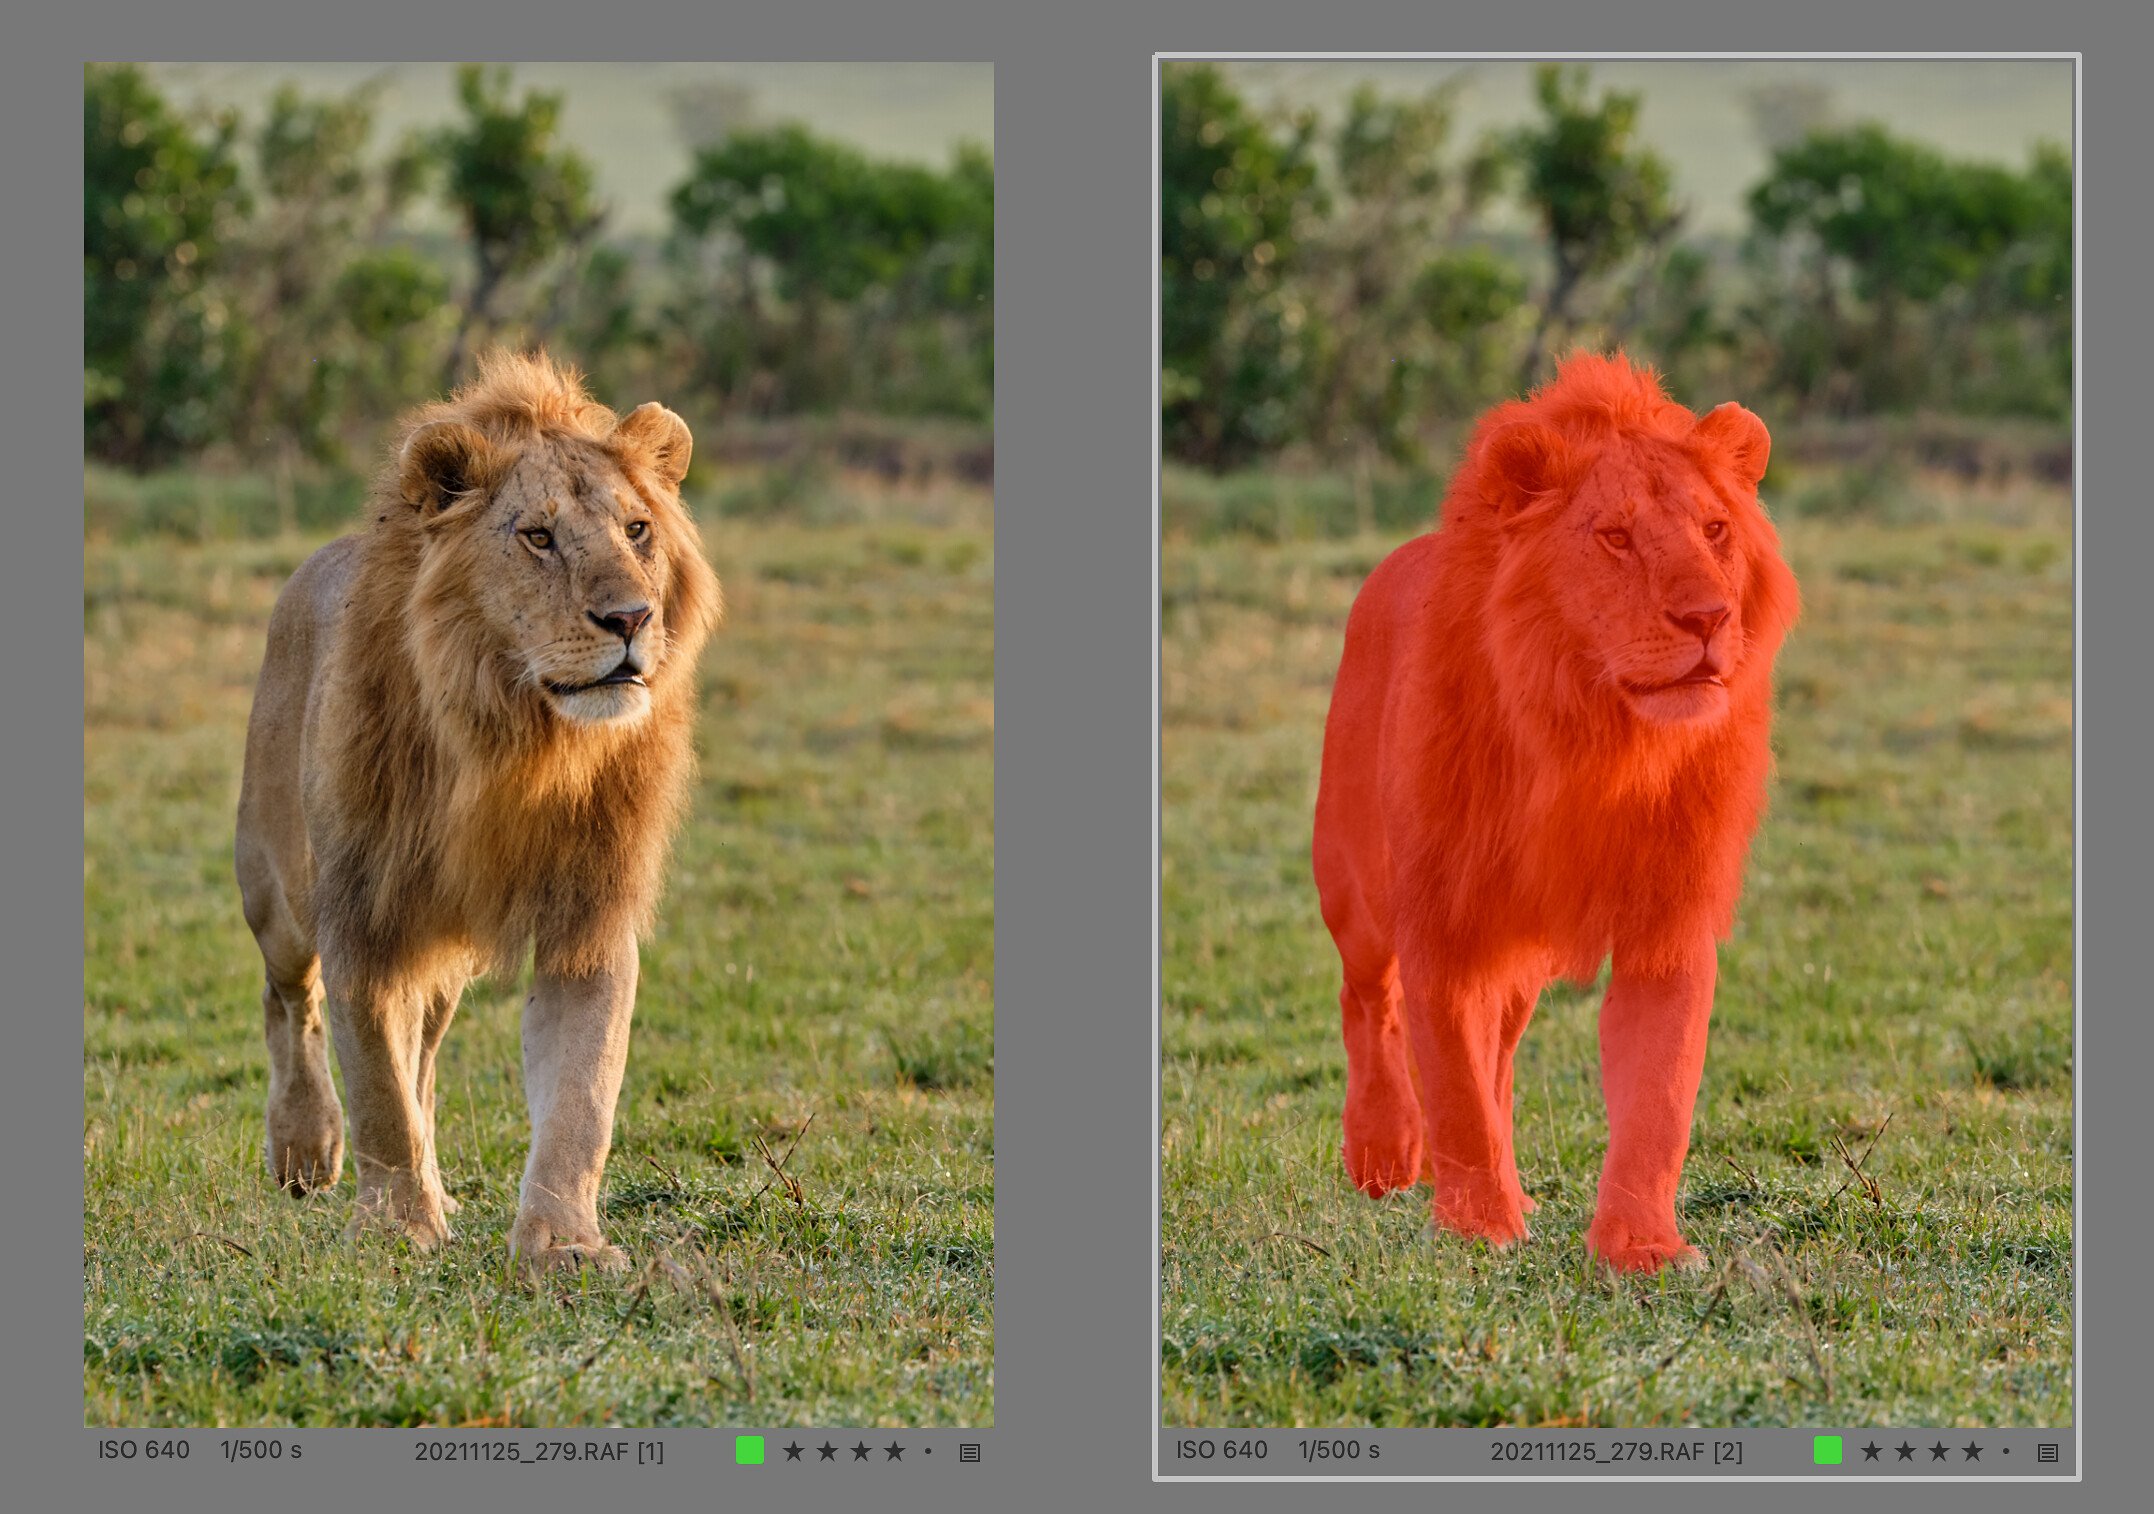
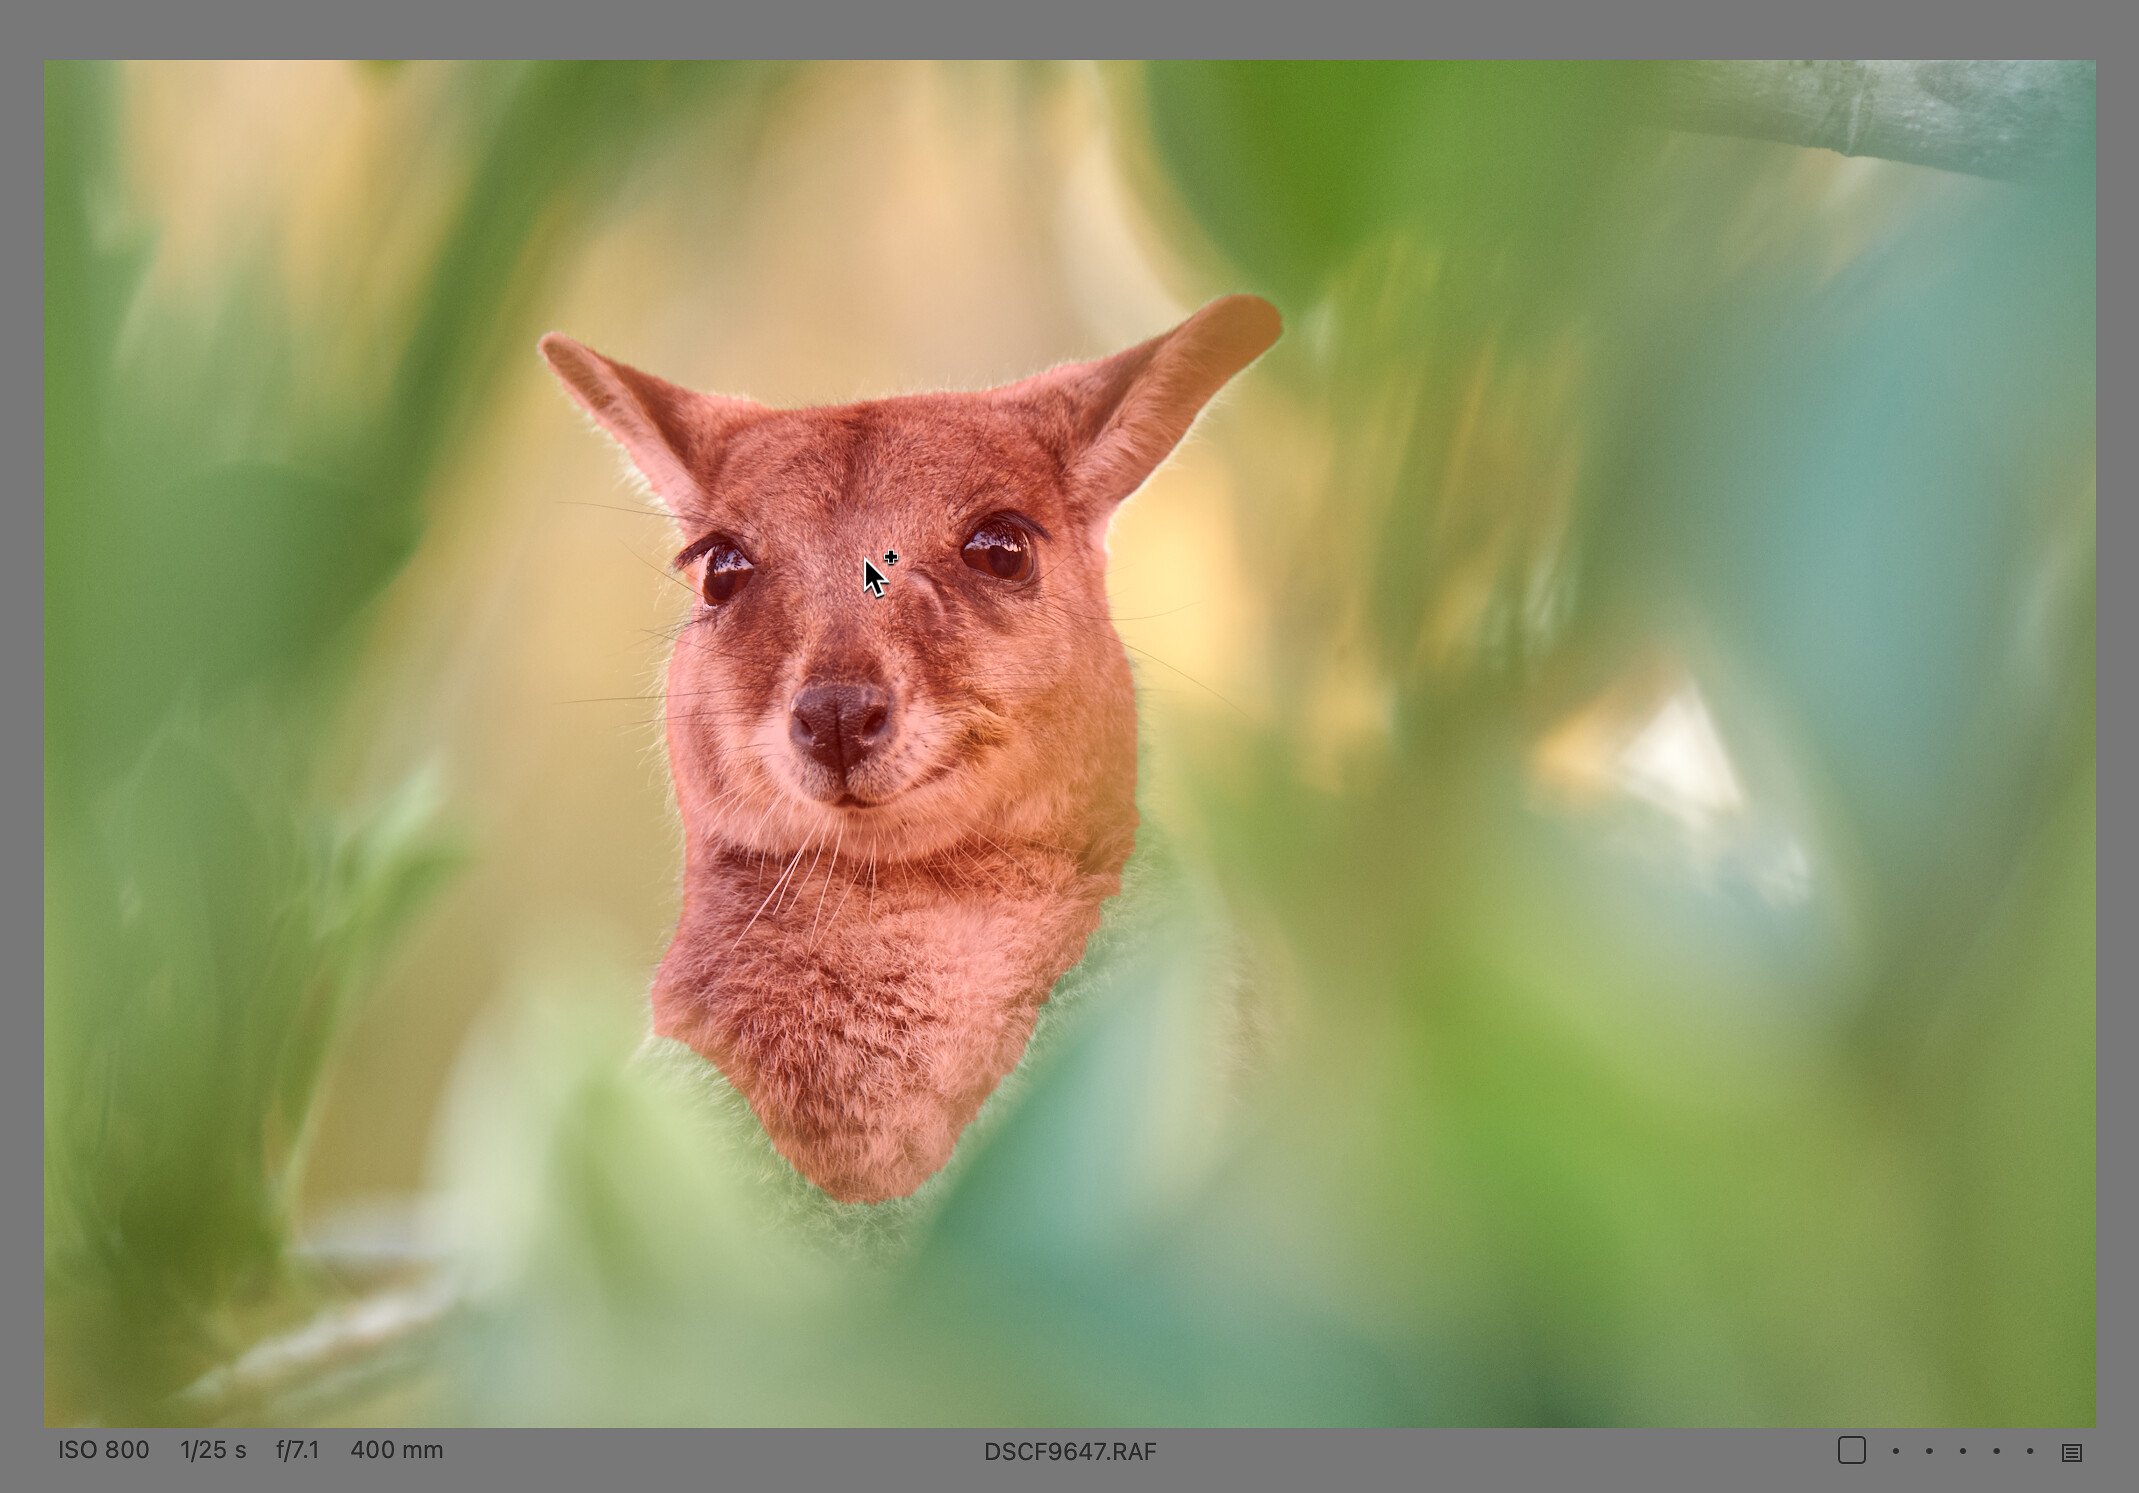
Interestingly, unlike some competing applications, we do not select a specific type of object – i.e. whether it is a person, animal, etc.. Capture One does all the work for us, and it usually works very well, as the following examples of masks created by these tools show:
It’s fair to admit that in some circumstances the algorithm may fail to detect the subject, or it may select something that doesn’t match expectations. For example, in some landscape photographs I would expect the Subject button to select the landscape and exclude the sky, but in reality the algorithm sometimes selects only a certain part of the foreground – for example, a rock, a tree, and so on. Fortunately, there are other ways to use AI masks.
AI brush and eraser
Based on the previous paragraphs, it might seem that Capture One’s capabilities in terms of AI masking are limited, since we can target some specific parts of the image in competitors, such as face, hair, but also water, trees, and so on. But the opposite is true. If we need to work precisely (or if the main object detection fails, which can happen), a second tool, or rather a pair of tools, comes into play: the AI brush (called AI Select) and the AI Eraser.
They elegantly replace dedicated tools for selecting specific objects. It doesn’t matter if you want to select a face, a sky, or a plant – you just click on the desired object in the photo and you’re (mostly) done. While this may seem similar to more basic tools that simply recognize a continuous area, it is actually a full-fledged AI algorithm that recognizes objects through intensive machine learning.
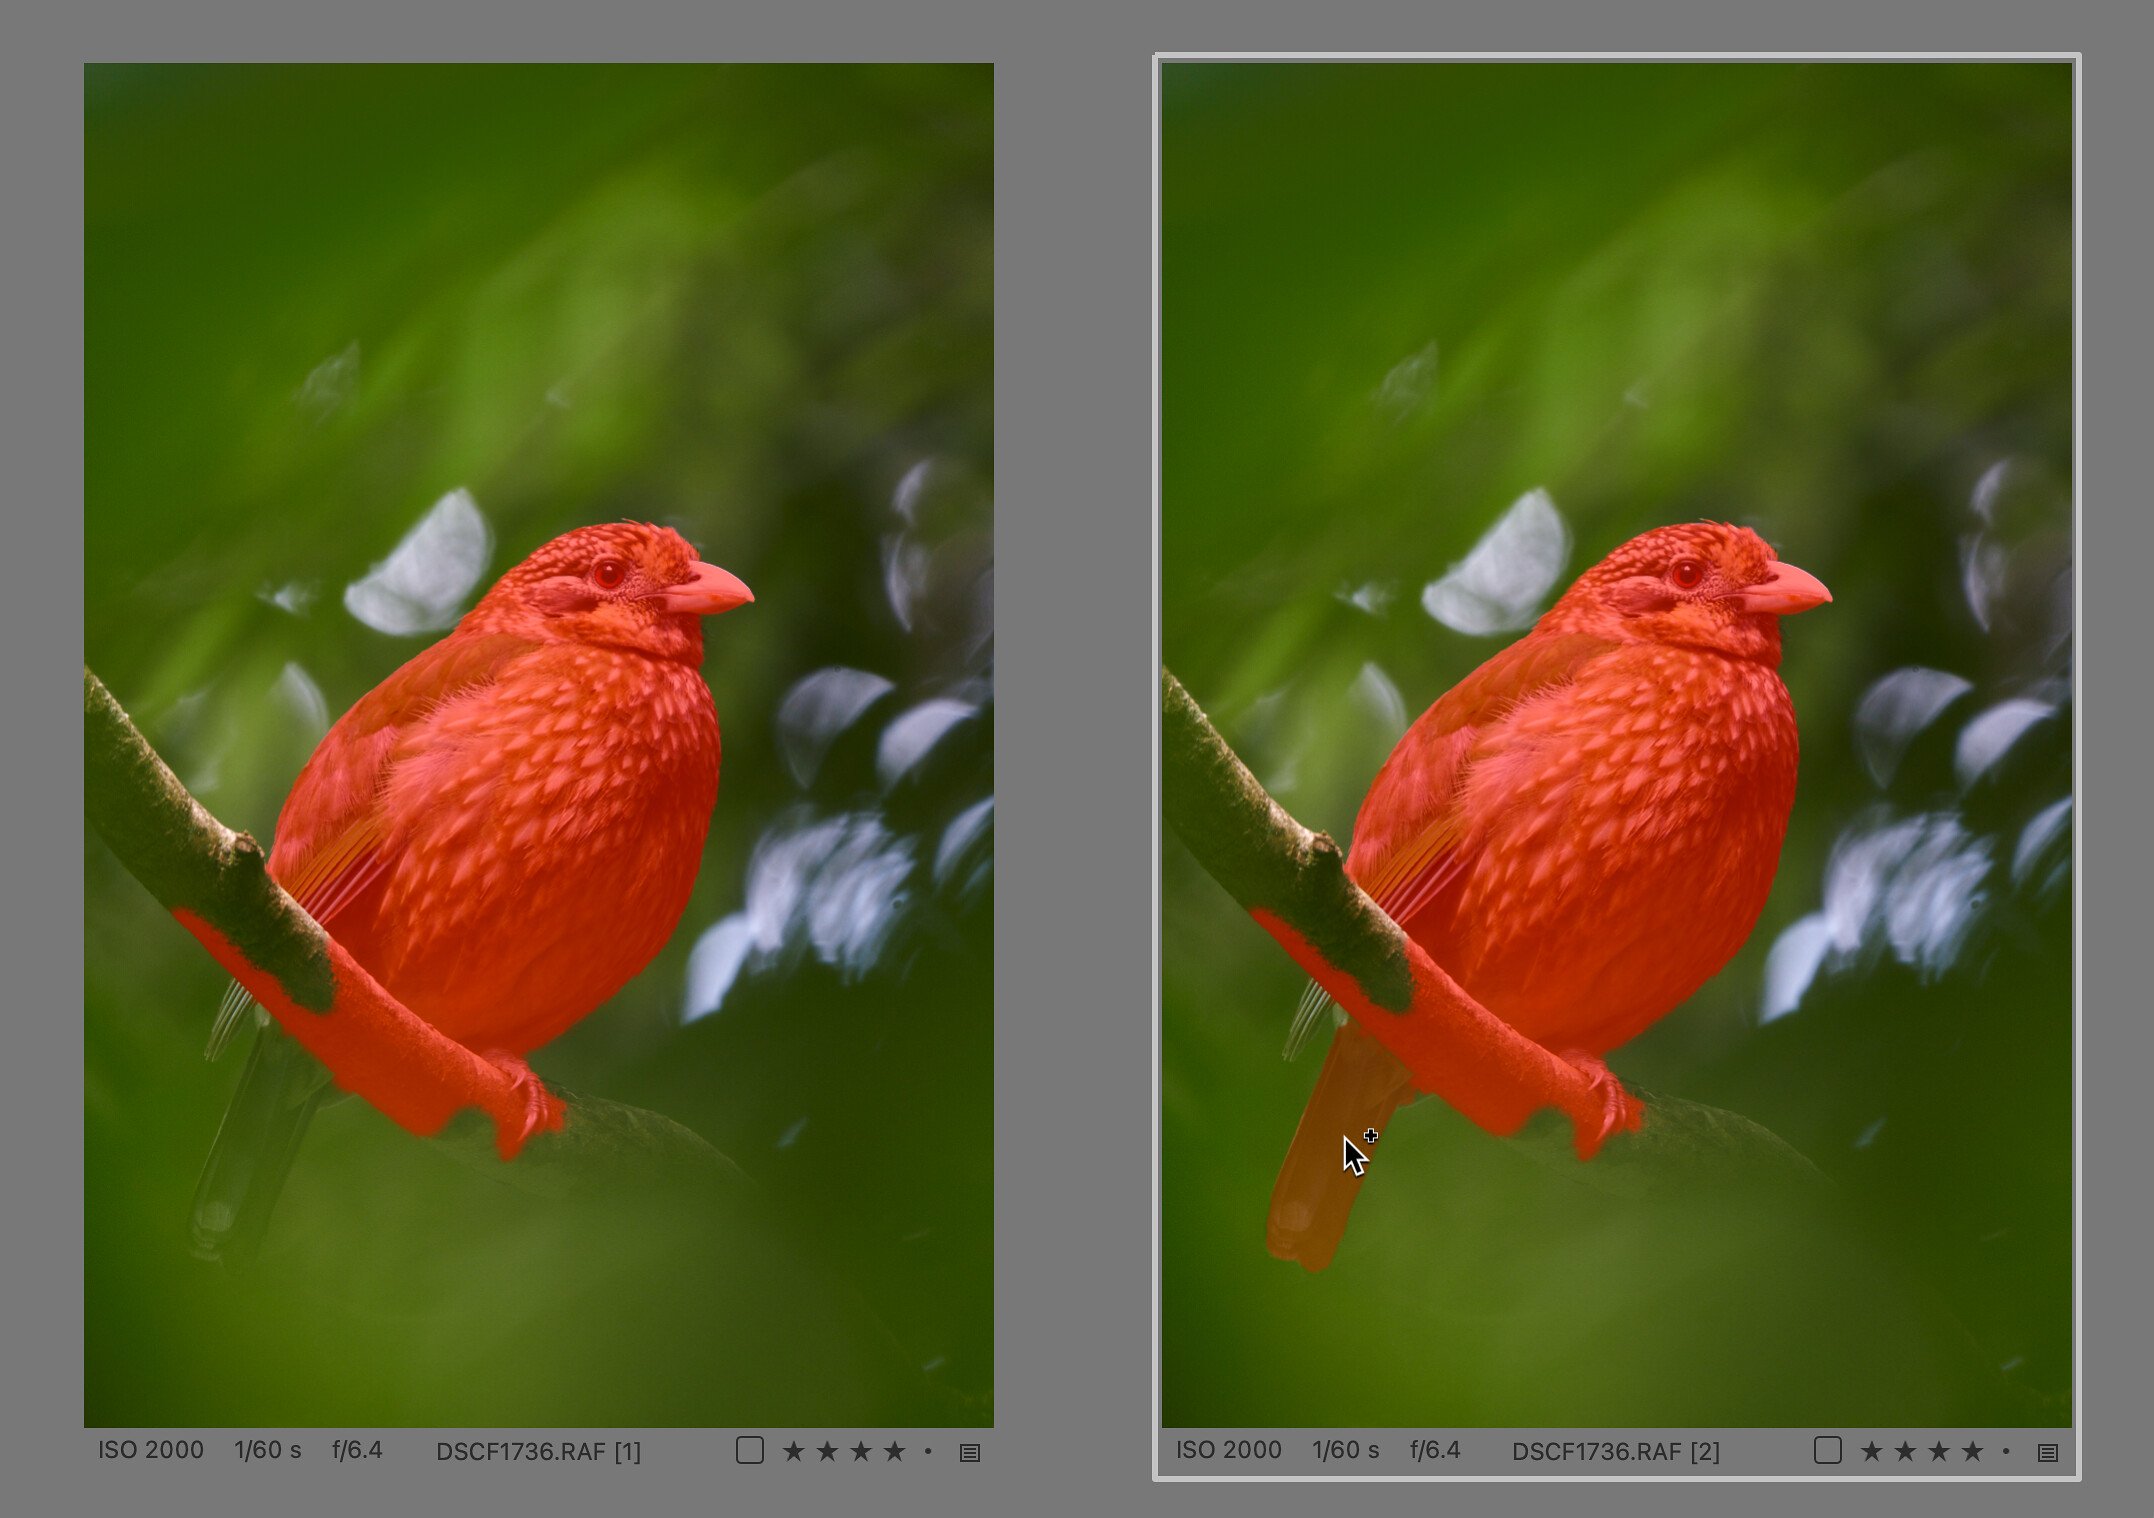
It’s very easy to use. Once the brush (or eraser) is activated, Capture One creates a map of the objects it finds in the photo. This takes a few seconds (depending on your computer’s performance), and then you can start working with the brush. When you move the mouse over the photo, a preview of the object masks detected under the cursor appears almost immediately. This preview is displayed in the same color as the final mask, only with less intensity, and until you click the mouse button, the mask of the active layer will not change in any way. So you are free to try placing the cursor in different areas and see what kind of selection you get:
Note that this preview is a little less accurate and that the final mask is calculated only when you click on it. So do not worry if the edge of the selection in the preview is not perfect or does not reach the edge of the subject. When you click on it, it will most likely be almost perfect.
If it happens that the whole object cannot be selected with one click and part of it remains unselected, you can safely confirm the mask and add the missing part or parts with a second click.
The AI Select tool has another trick up its sleeve to improve object recognition: you can also mark an object with a rectangular selection. Instead of just tapping on the object you want to select, you can click and drag to roughly outline it. This both eliminates extraneous elements from the selection and gives Capture One a better indication of what you want to select in the photo:
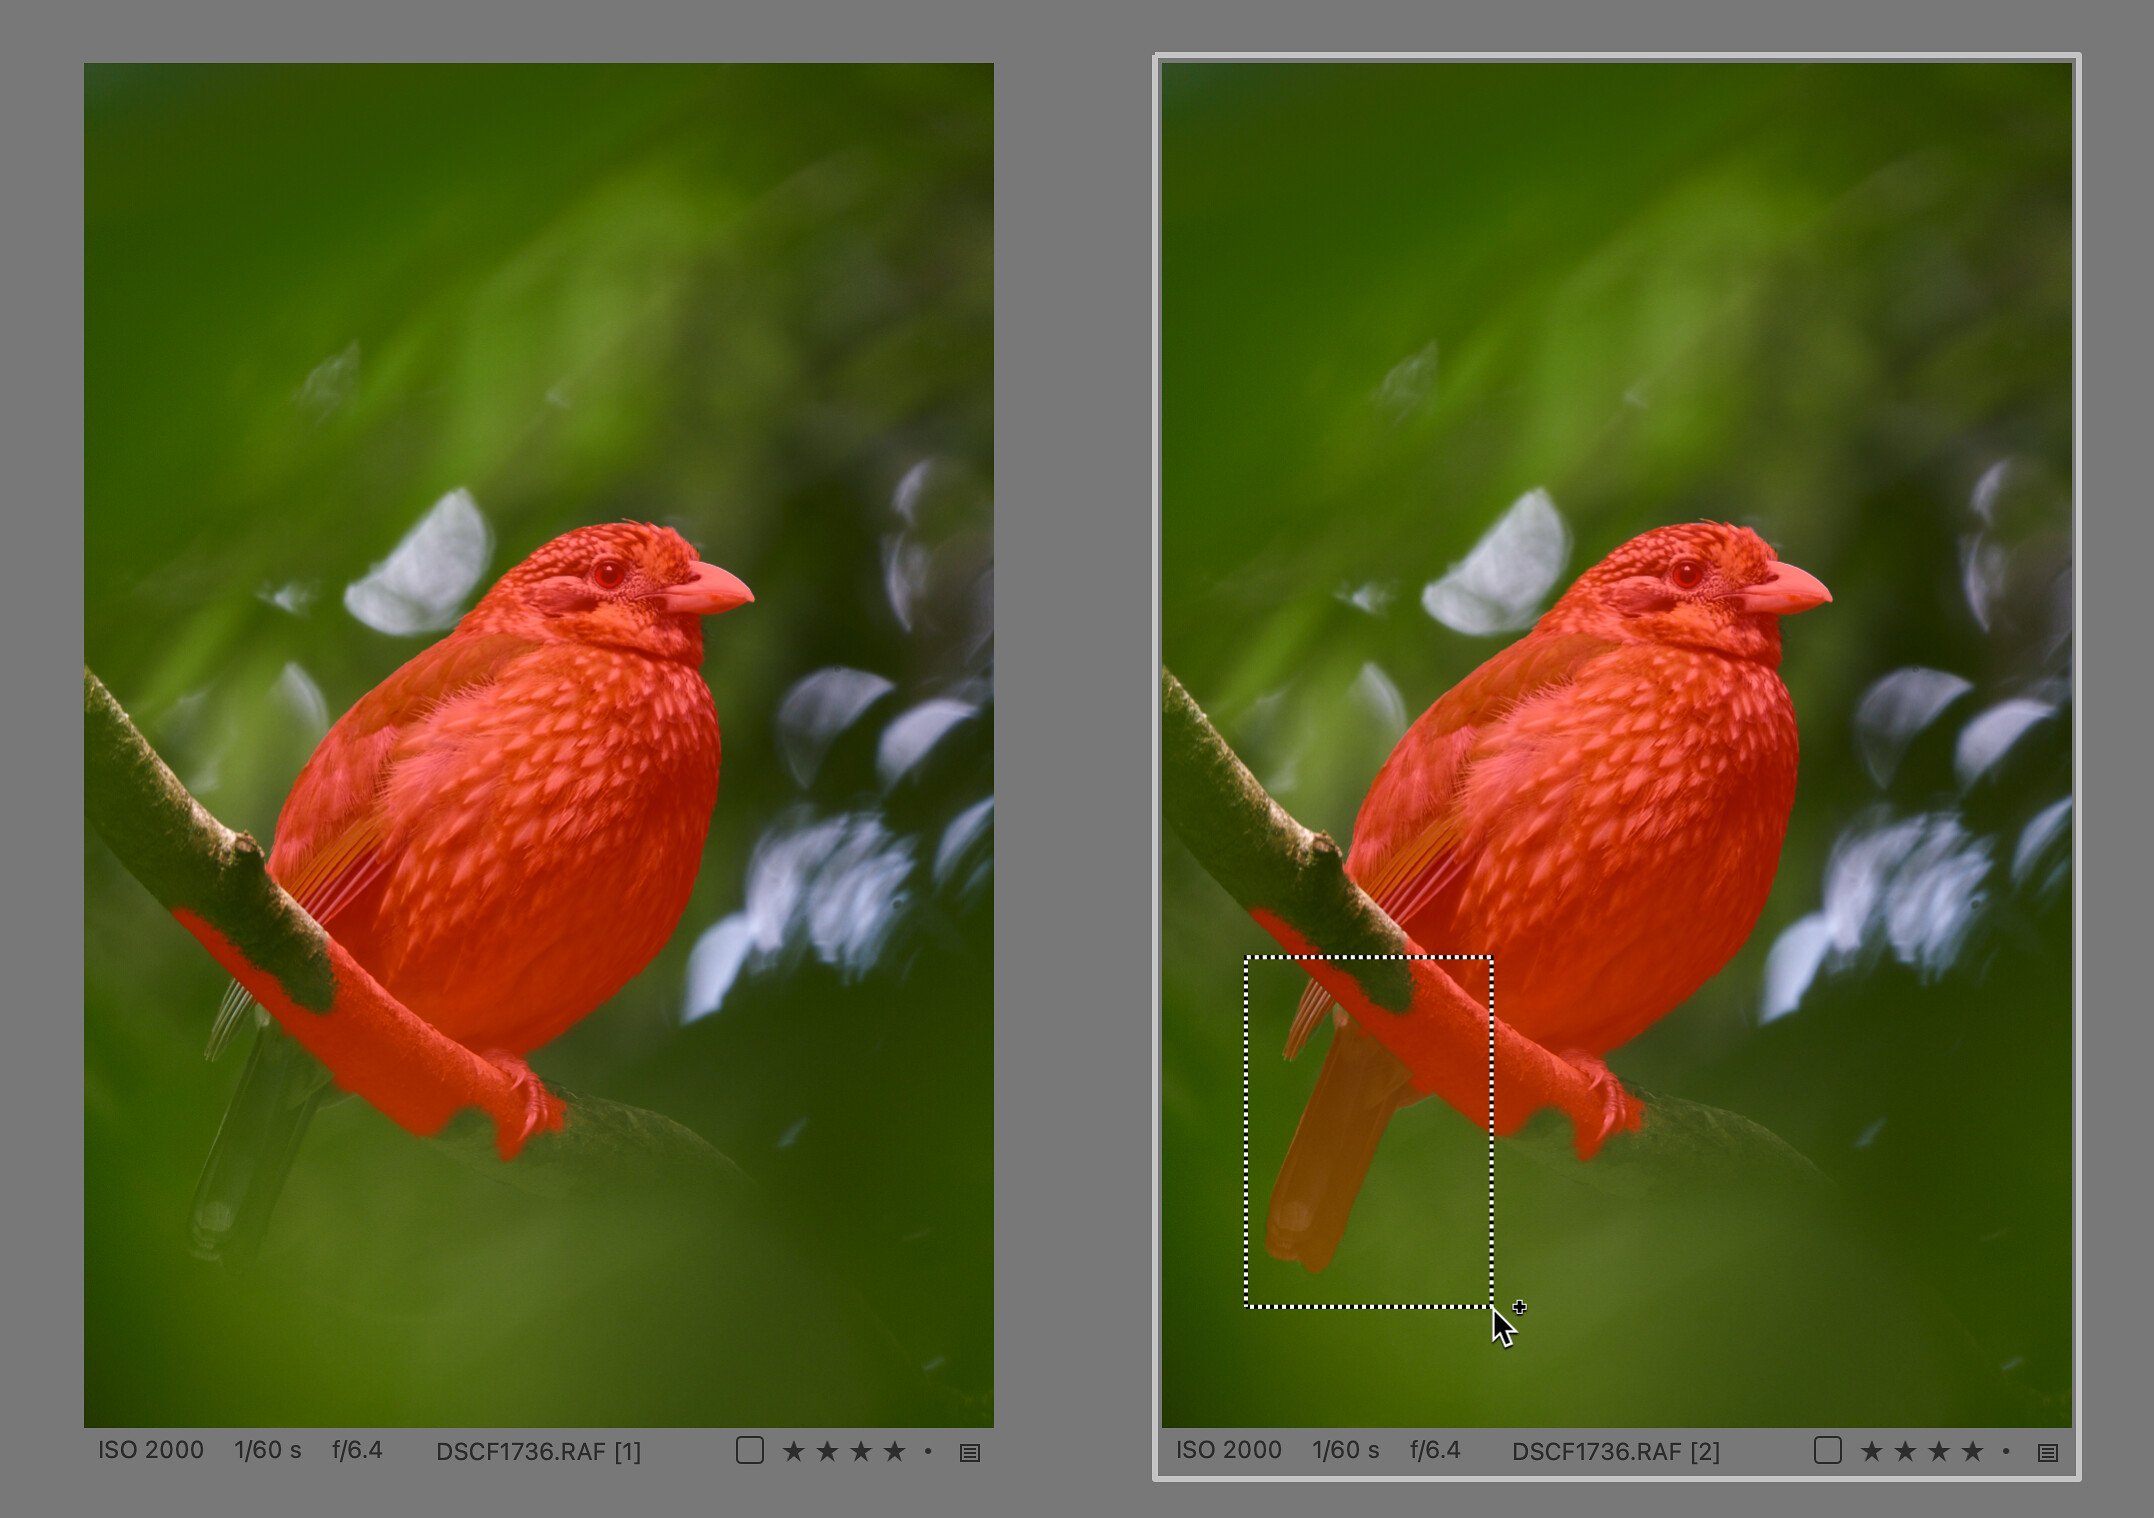
The rectangle selection method has the additional advantage that it usually doesn’t create gaps in the mask, which can happen when you click on individual areas one after the other.
Everything we said about the AI Select also applies 100% to the AI Eraser. When it is active, the preview of the object selection under the cursor is shown in the opposite color – the AI eraser uses a cyan preview to the default red mask color. Of course, the eraser also supports rectangular selections, so it’s really easy to quickly adjust the mask to suit your needs.
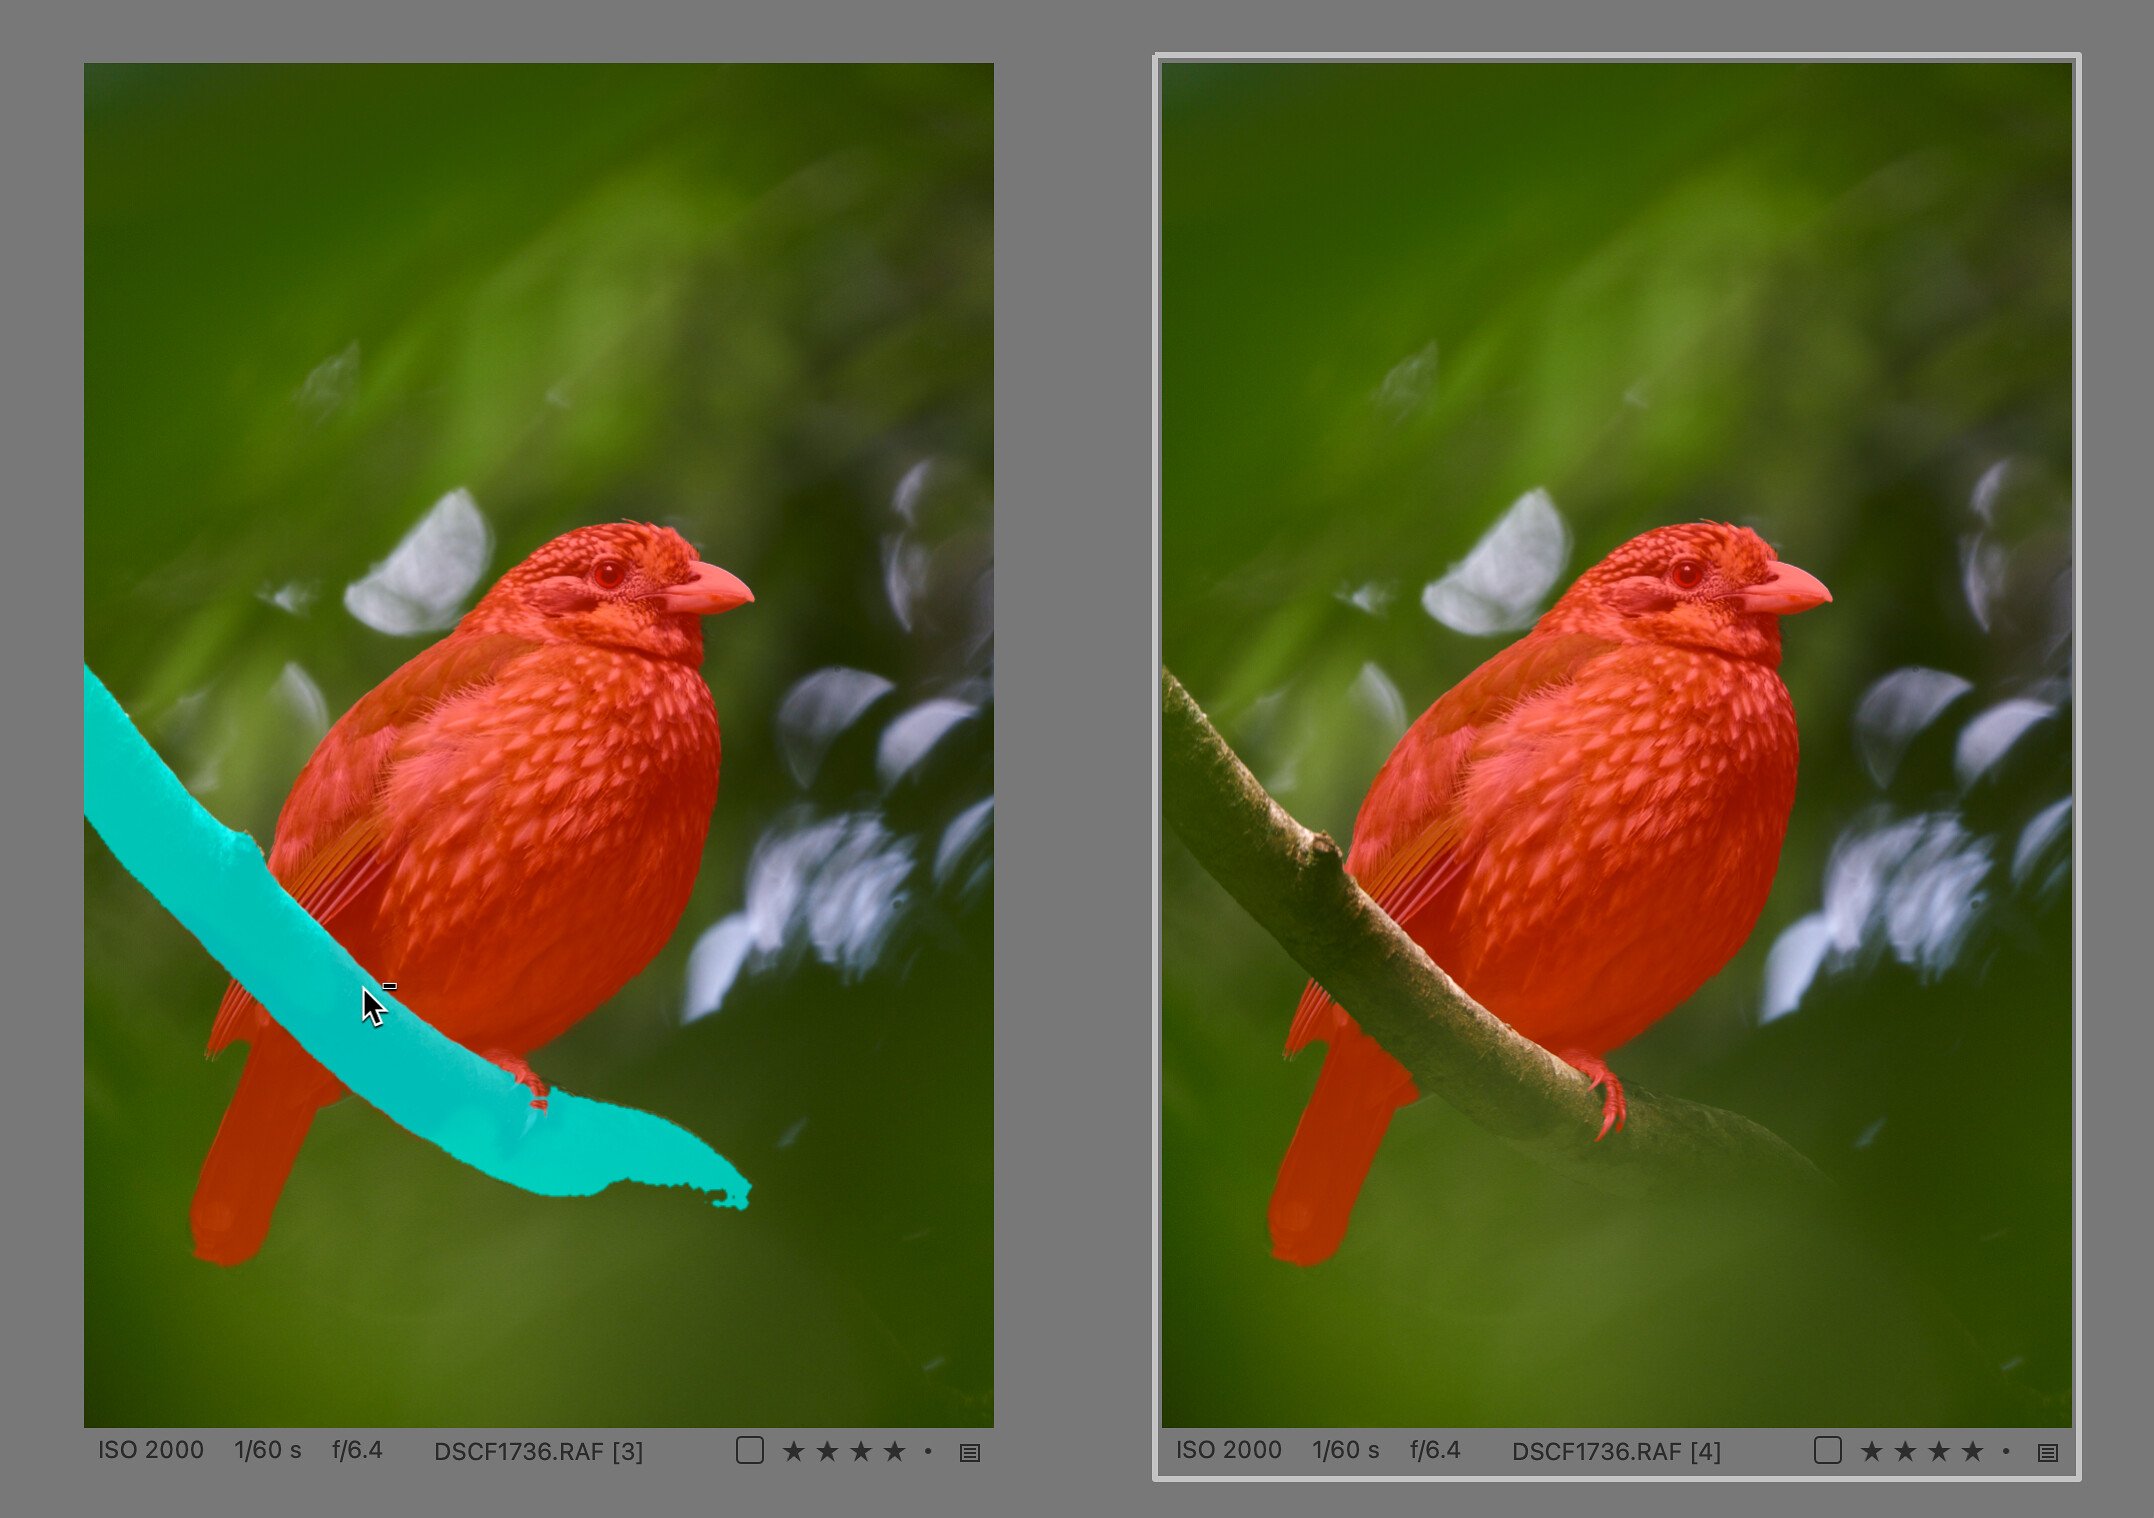
The preview of the mask is again a bit less accurate, and the final selection is made after clicking. Of course, unlike the AI Select, the AI Eraser doesn’t add areas to the mask, but removes them from it. This way we can easily get rid of the mask in areas we don’t want to edit with the layer.
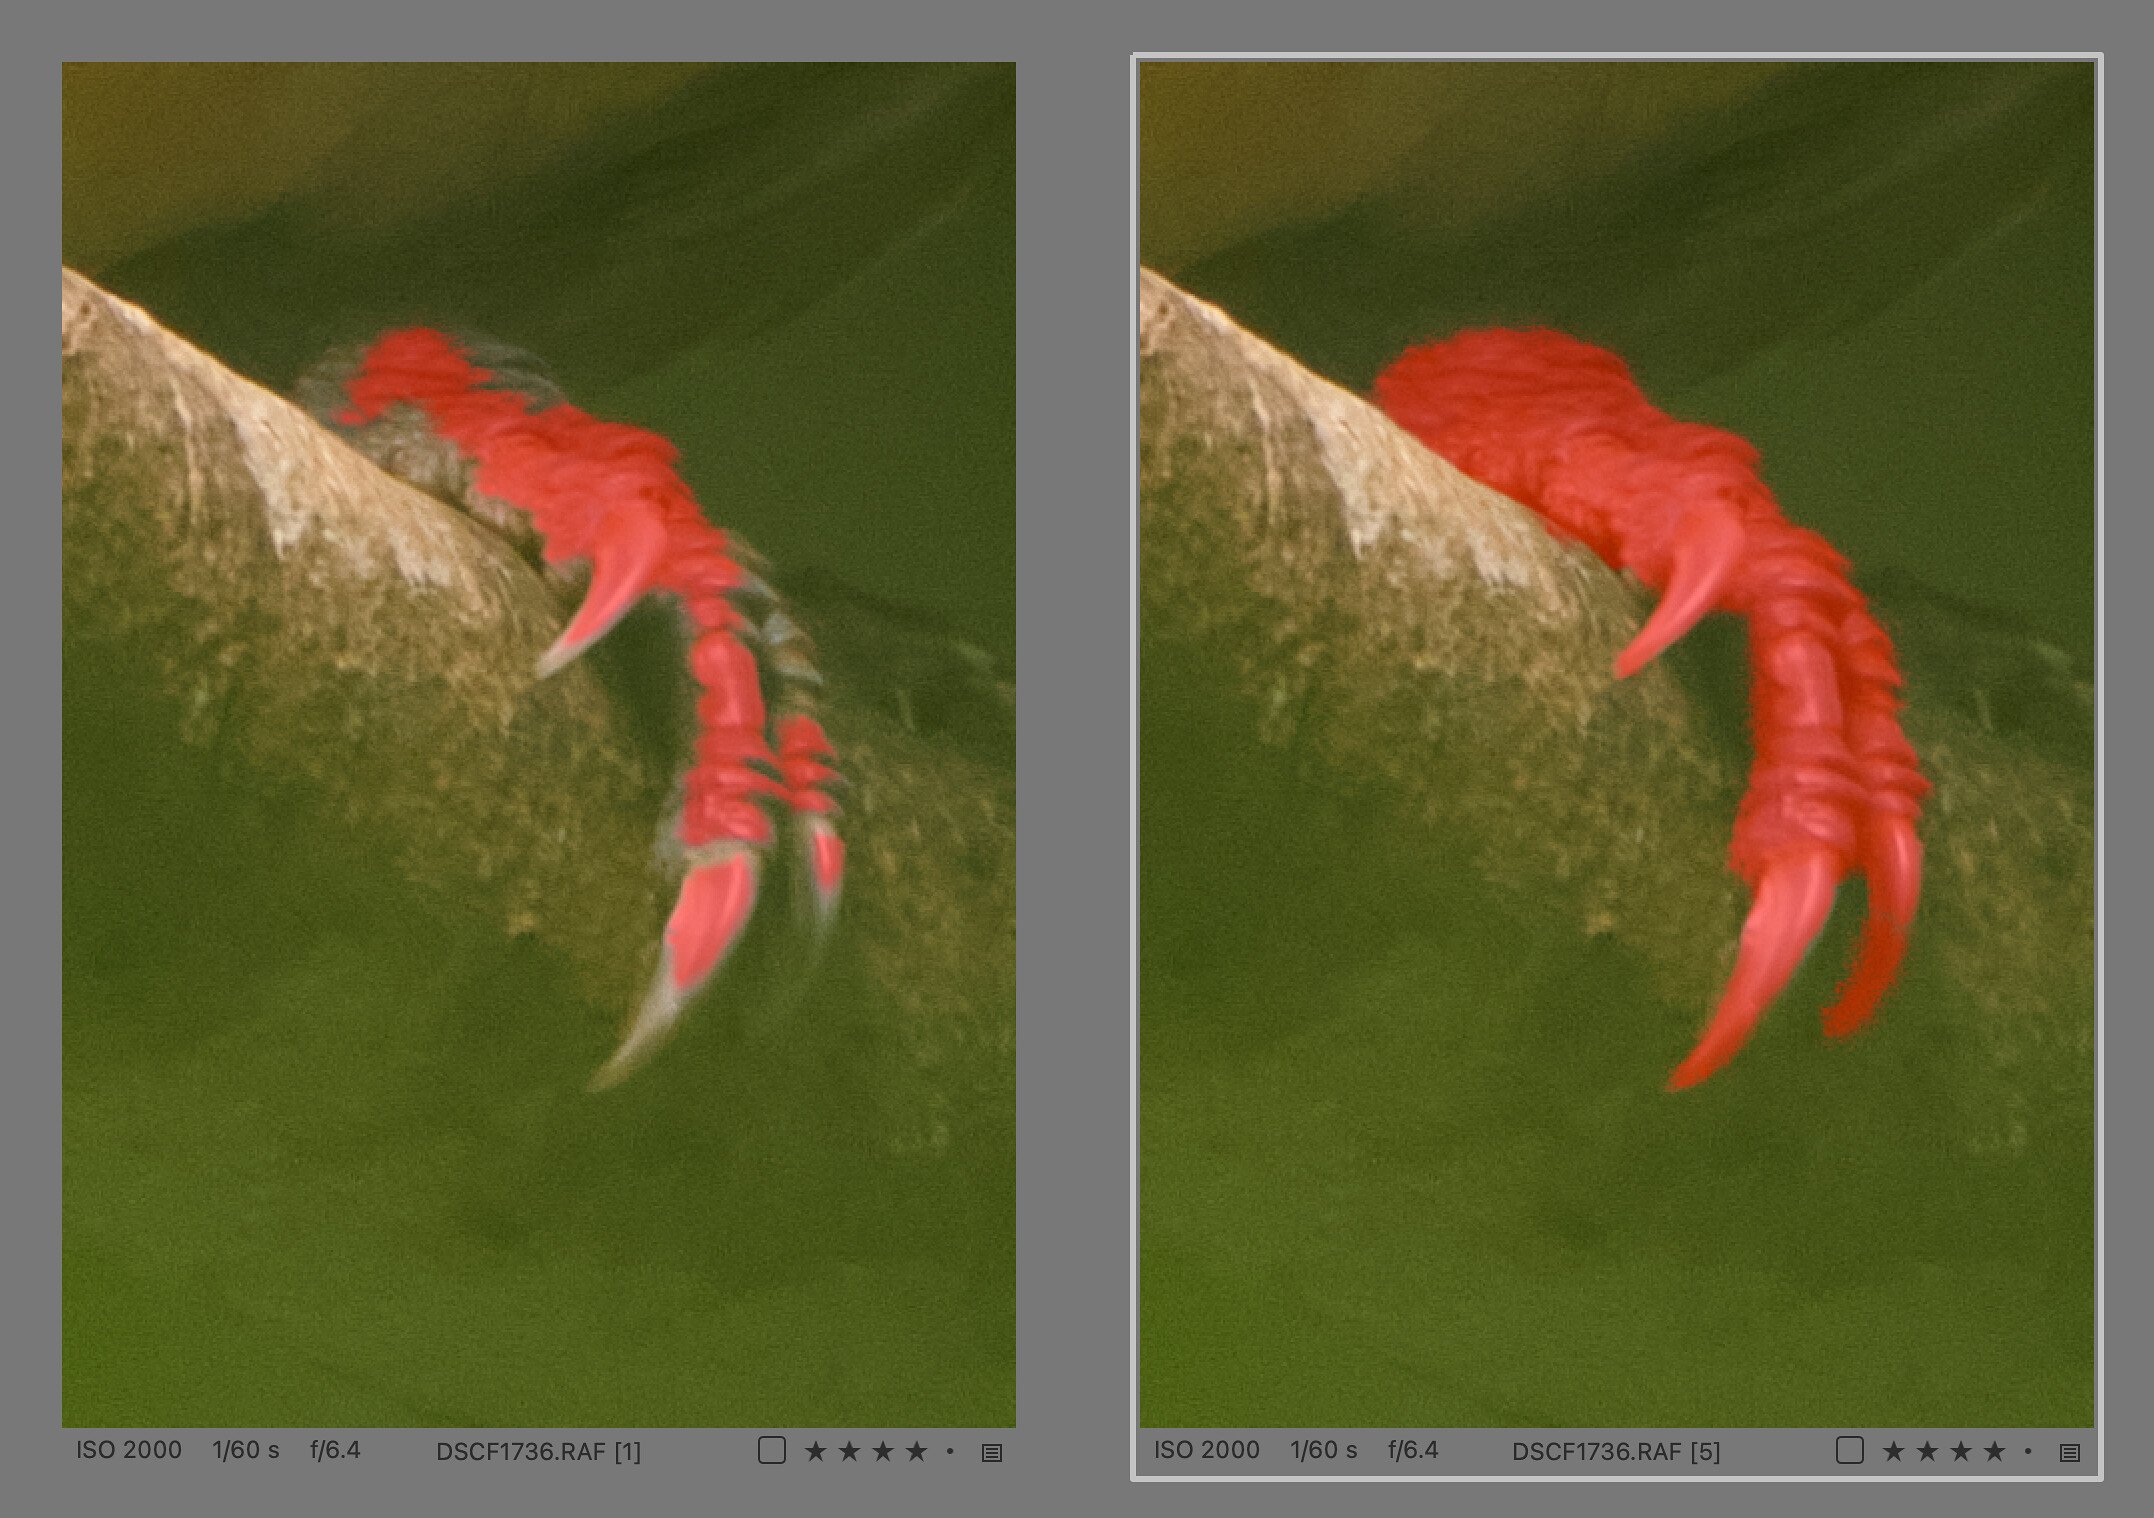
Sometimes it can happen that the selection of small details is not perfect – either too much or not enough is selected. But Capture One offers another useful trick: when you zoom in on a photo, the object map is recalculated with greater precision only for the visible section, and then the AI brush and eraser work even more accurately.
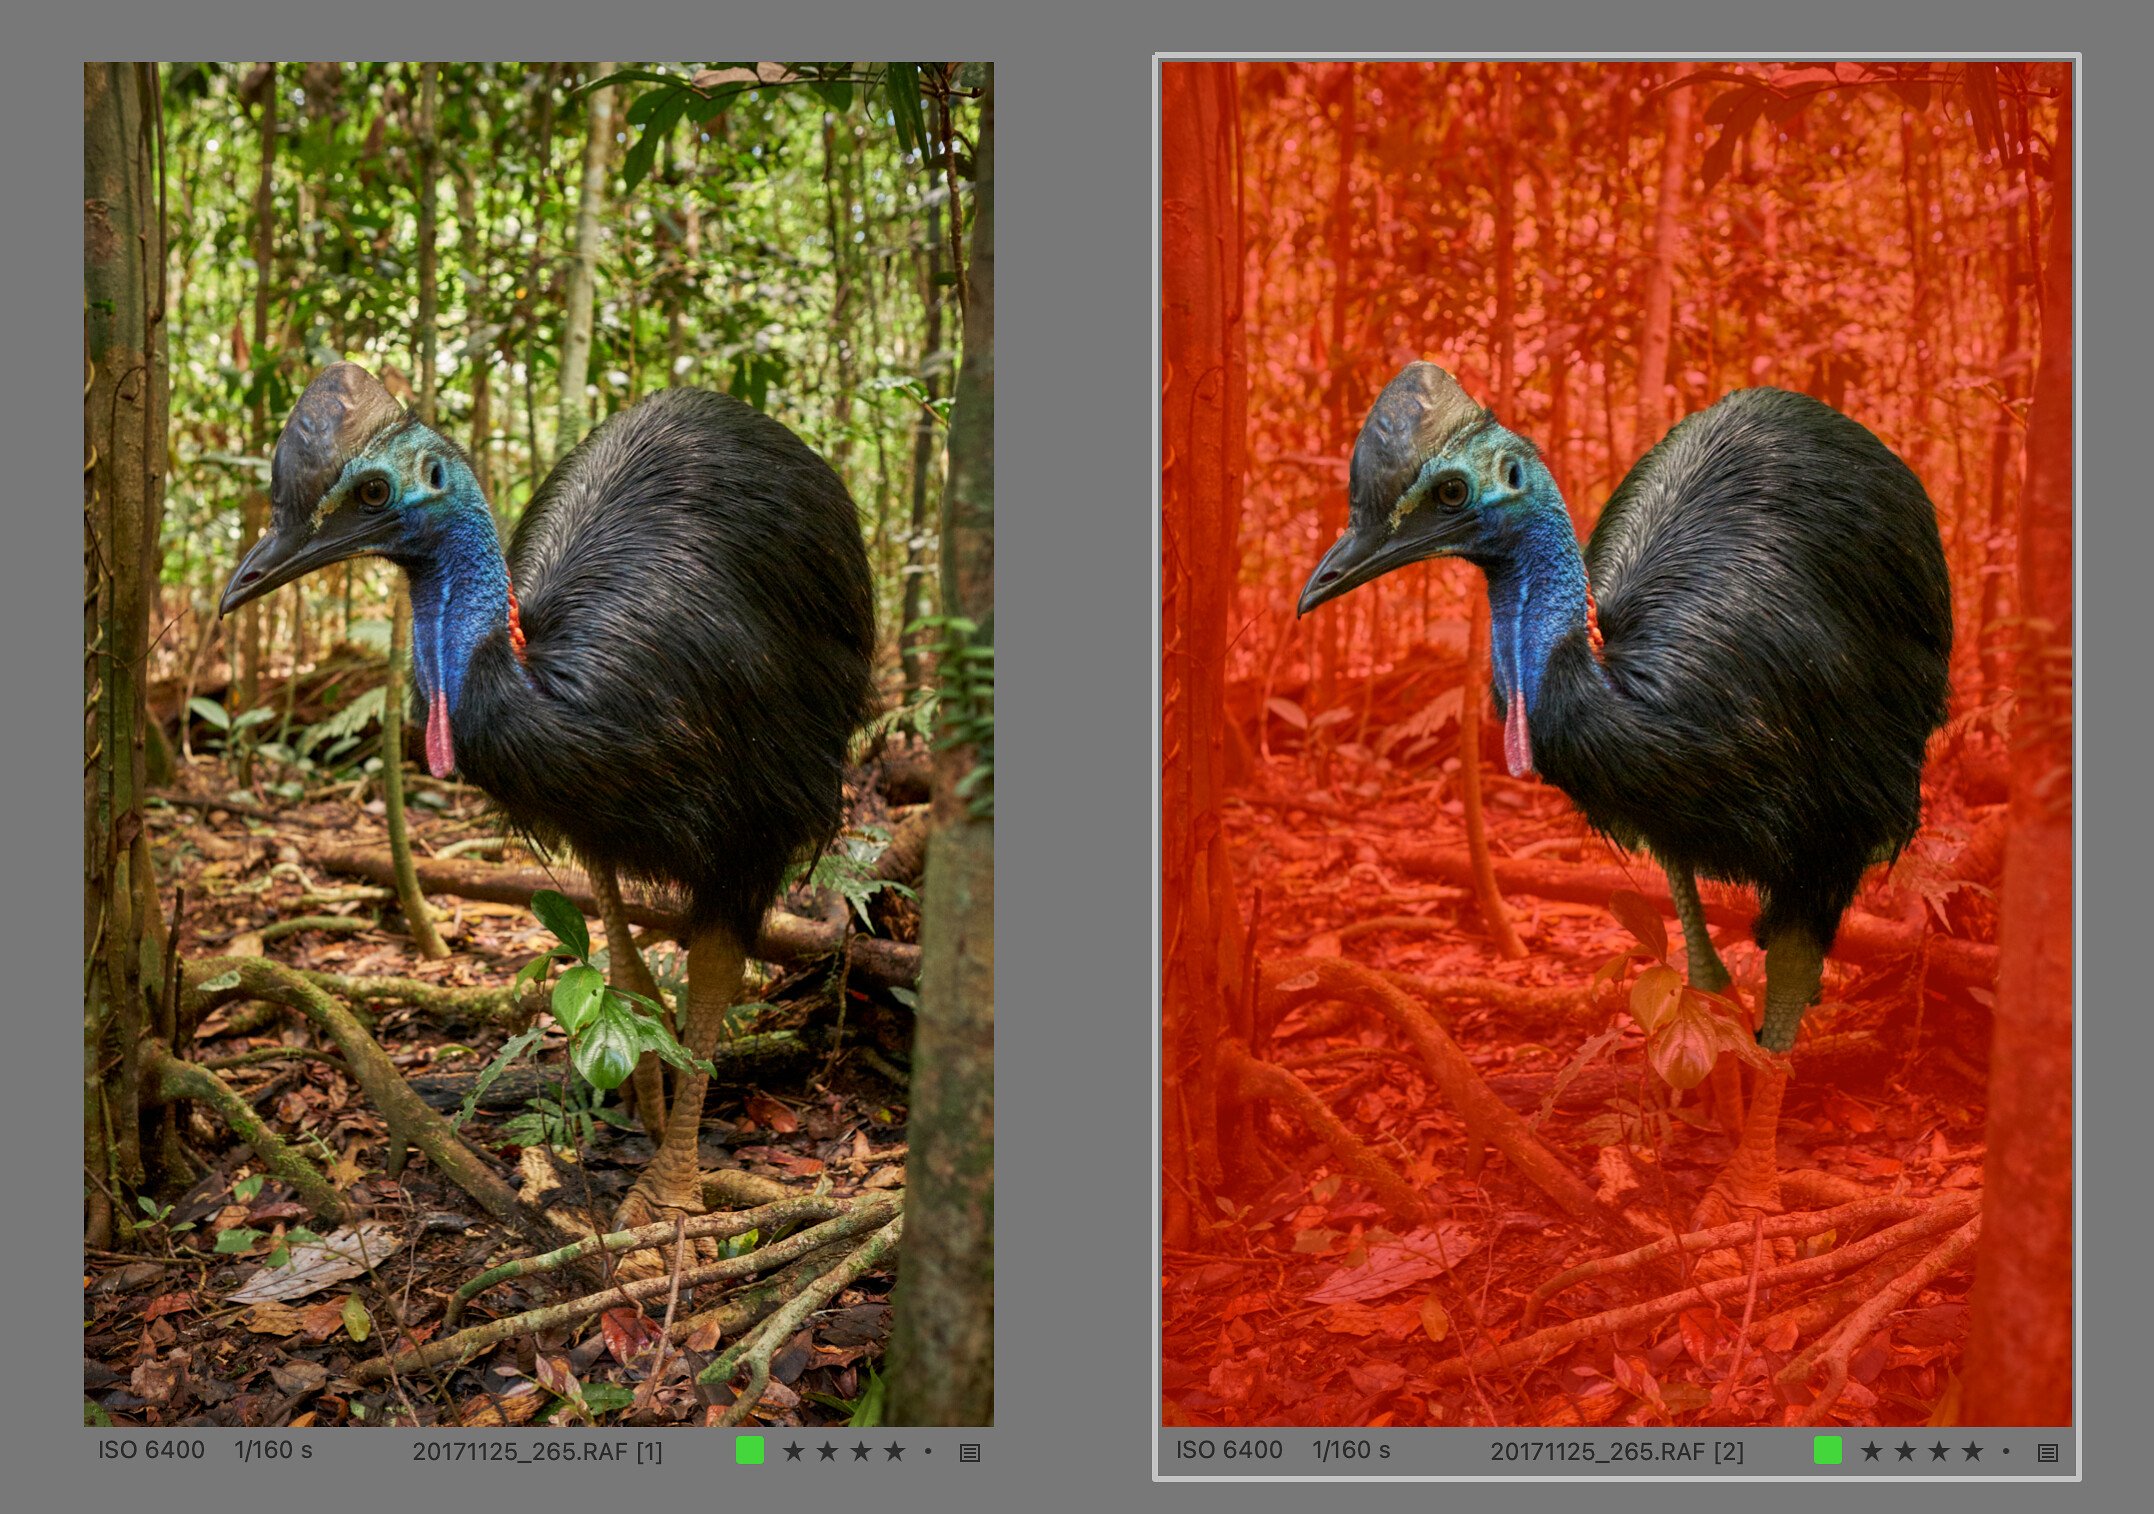
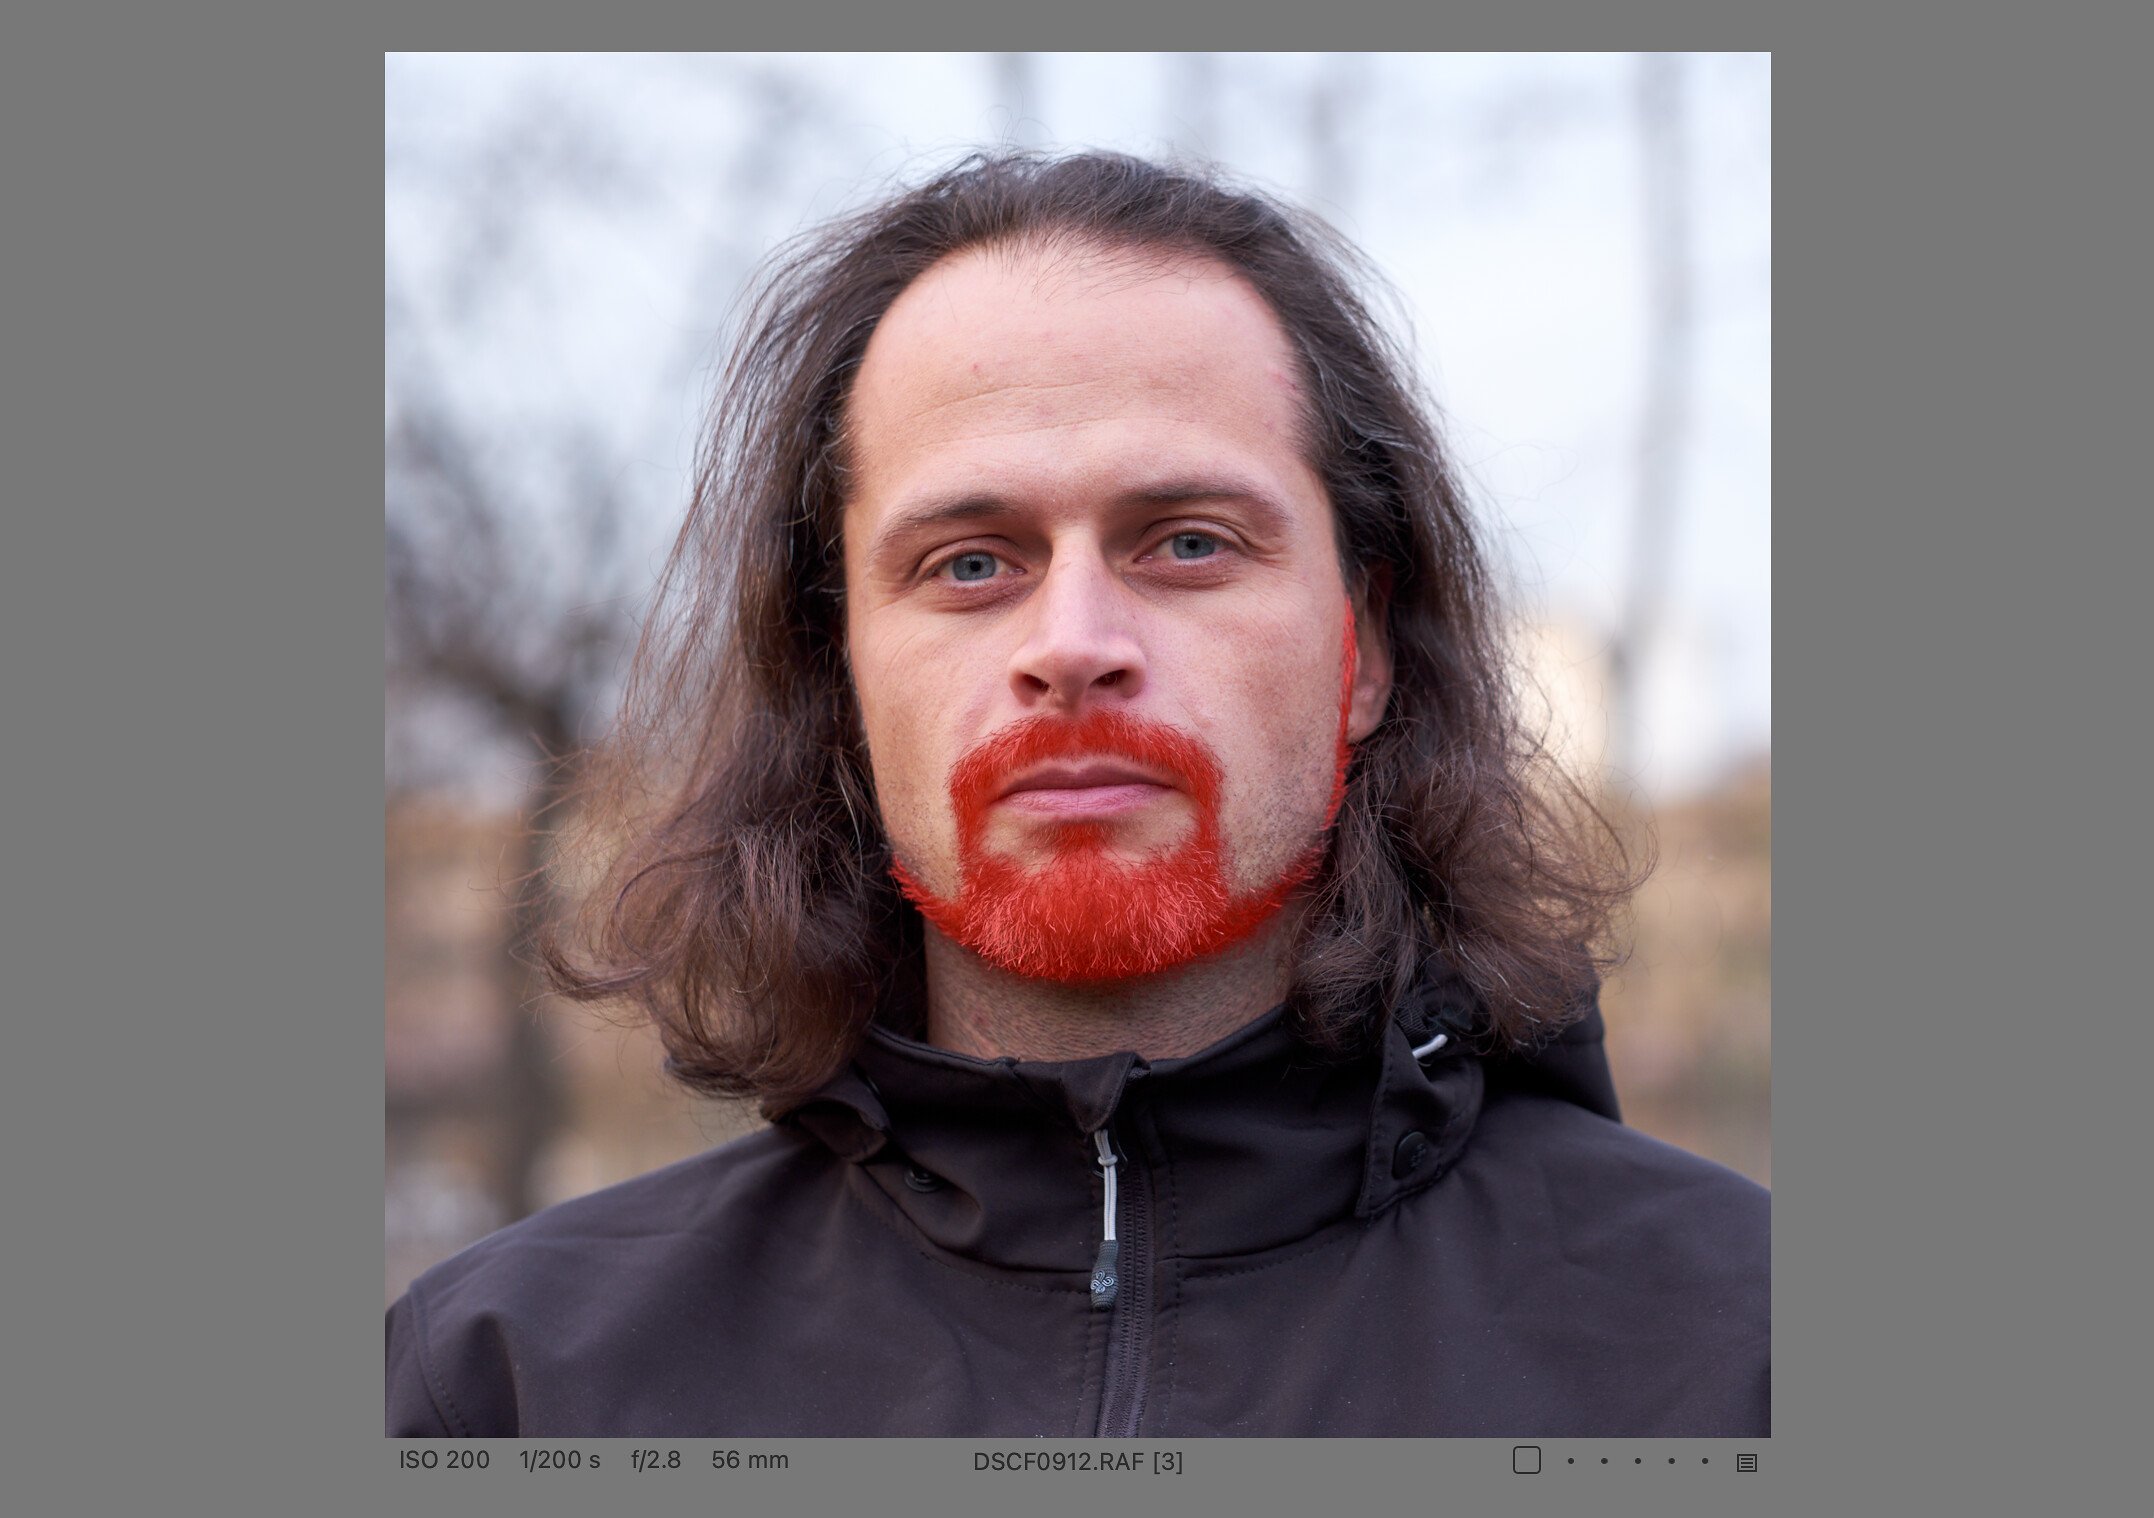
You can also select only parts of objects with the AI brush. For my experimental self-portrait, for example, I quickly selected just the beard with a rectangular selection:
The combination of fully automatic tools and the AI brush/eraser is really powerful and allows you to quickly select almost anything you can think of. The only weakness I’ve found so far is the selection of the sky, including areas that appear through the trees, which is actually a similar situation to my hair in the self-portrait above – I see room for improvement here. Of course, only long-term experience may reveal some other weaknesses, but for now I am excited.
Of course, you can combine the new tools with the old ones. For example, you can use a regular brush on an AI-generated mask, or subtract a part of the previously created mask with the AI Eraser (unfortunately, gradient filters still need to be rasterized).
ReTether
The second major feature of the new version has to do with tethered shooting. It’s called ReTether, and its purpose is to automatically download photos from the camera card that were taken within two hours of the last time it was connected to Capture One. This means that you can connect your camera at the beginning of a session, then disconnect it, shoot without being limited by the cable, and when you reconnect, the photos you have taken in the meantime are automatically downloaded to the appropriate folder in Capture One. All the benefits of tethered shooting in Capture One apply to this import, such as automatically applying edits from the previous photo, naming files according to a specified pattern, and so on. The feature should work in the same way not only when you intentionally disconnect the camera, but also when you accidentally lose the connection (dropped cable, etc.).
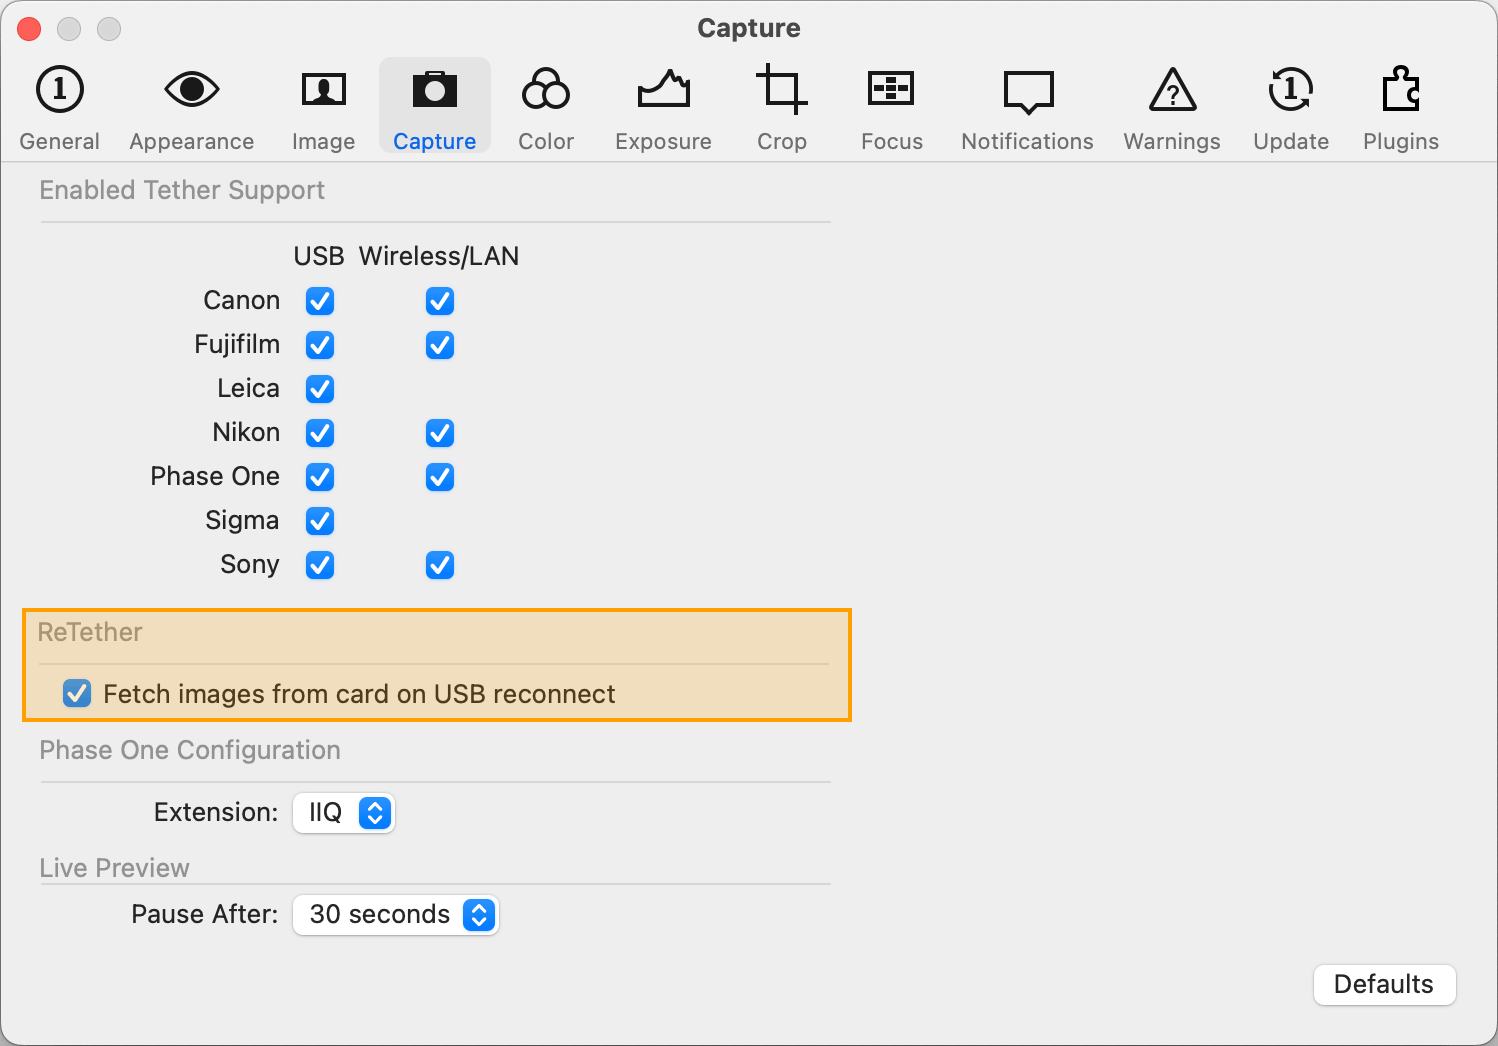
You can continue shooting while the missing files are being transferred – new images have priority, old images are transferred during inactivity. For an acceptable transfer time, it is recommended to take no more than 100 to 300 photos without a connection. This feature requires a USB connection (does not work over WiFi) and is currently limited to Canon and Nikon cameras. It is also disabled by default and must be enabled in the application settings:
Other additions and enhancements
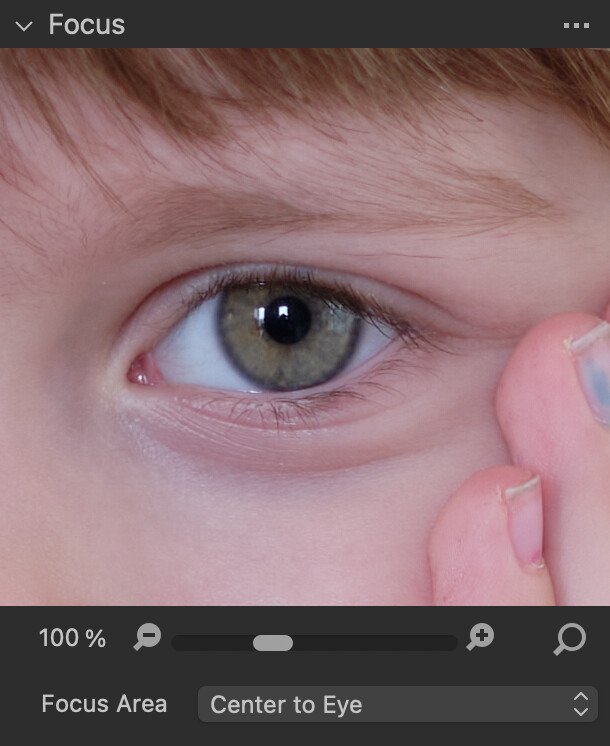
Other new features include automatic eye or face focus in the Focus tool. If you’re using it to evaluate the sharpness of a photo, you can turn on automatic centering on an eye or face right in the tool, giving you an instant overview without having to move the crop.
The Reset button on the main toolbar now offers a submenu with options to reset only the crop (Reset Crop) or all adjustments except the compositional ones, i.e. except crop, rotation, perspective correction, and lens distortion (Reset Except Composition).
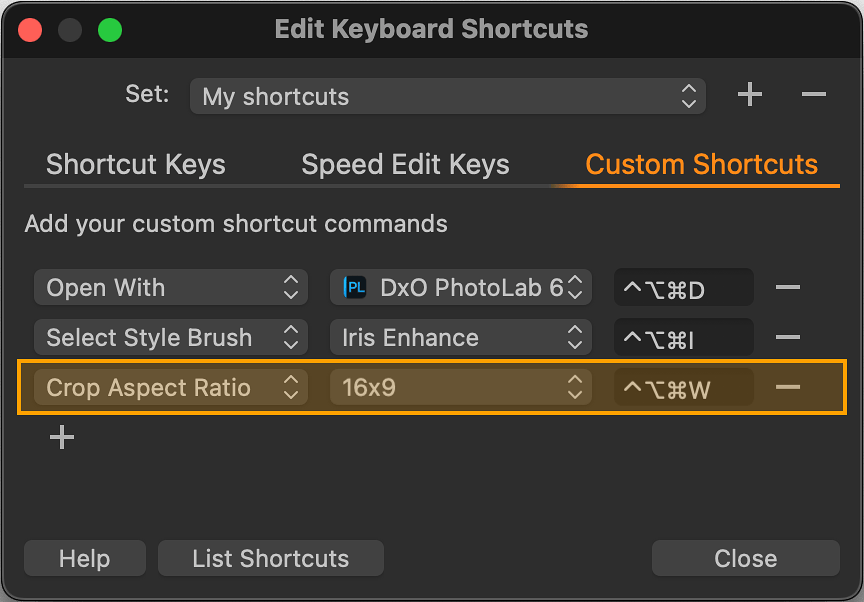
You can now also set the keyboard shortcuts for activating the black-and-white conversion and for the two new reset functions mentioned in the previous paragraph. Also added is the ability to assign a shortcut to specific crop aspect ratios.
You can duplicate an entire layer, including mask and edits – this feature is found in the context menu that opens when you right-click on the layer name, and is (unsurprisingly) called Duplicate Layer.
Another welcome improvement when working with masks is the temporary switch between brush and eraser by holding down the Alt key – this applies to all three brushes, i.e. regular, magic and AI.
On Windows, you’ll be happy to know that the Luma Range dialog no longer blocks access to the photo, so you can pan or zoom while setting the luminosity mask. The Mac version will allow the same later.
The new version generates previews faster and, most importantly, significantly reduces their size by up to 50% without compromising their quality or capabilities. From experimenting with a test set of photographs I use in my workshops, I can actually confirm such a significant reduction in catalog size. This is definitely good news for all photographers who manage a large number of photos (which is pretty much everyone in the digital age :) However, for the savings to take effect, the previews of the older photos must be regenerated, otherwise only the ones you add to the catalog after the update will be affected. If you want the maximum reduction, I recommend that you regenerate all previews (preferably overnight).
Other performance improvements have been made in switching between photos, zooming and panning. Especially on the Mac, painting masks with a regular brush should be much faster.
Capture One for Mac has also received a new photo sharing plugin for Glass.
A cloud-based service for sharing photo collections with a client called Capture One Live now allows you to publish multiple collections at once (but only from Sessions for now, no behavior change for the catalog). The other new feature of Capture One Live is the ability to read, write, and delete comments directly from within Capture One.
Conclusion
The new version is packed with new features. The biggest one, the AI masks, is really great and after a long time I dare to say that it will make the life of almost all photographers, regardless of genre, significantly easier.
The ReTether feature is only intended for some users who use USB tethering, but I think it will be beneficial for them – I’ve seen a few times how unintentional loss of connection has complicated photographers’ lives because they end up confused about what’s on the computer and what’s only in the camera (and with differently named files).
As for the other improvements, I’m personally happy with the little things in the controls, like toggling between brush and eraser, and of course I’m happy with saving the disk space due to smaller previews.
In my opinion, this is what I expect from a new version of a professional application, and I hope that this was not the exception, but rather the promise for the future. Given the price and current licensing of Capture One, users deserve it.
Do you want to master Capture One?
You can buy my e-book Capture One: Work Effectively — a complete guide to this professional photo management and editing application. The well-organized content helps you master the entire process, from importing and organizing photos to editing, managing metadata, and finally printing or exporting.
It also includes tips for those switching from other tools like Adobe Lightroom, as well as a detailed description of my own workflows that I’ve refined over years of using Capture One to process my photos.
The e-book is available in formats suitable for e-book readers and as a more than 400-page PDF.